Chocolate Oatmeal

Chocolate Oatmeal

35 g        Old Fashioned Oatmeal
1/2 T      Chia
14 g        Almonds, ground
1/2 T      Cocoa
20 g       Chocolate Chips, 51% cocoa
3/4 C      Water
1/4 t       Vanilla Extract

  1. Put the cocoa and chocolate and almonds in a bowl and set aside.
  2. Put the oatmeal, chia seed, and water in a large microwave safe bowl (6 cups, at least – it seems overkill, but I have never had my oatmeal boil over in the microwave).
  3. Microwave for 2:30 on high power.
  4. Pour oatmeal into the bowl with the chocolate, add vanilla, add milk to taste, stir.

353 calories (without milk)

oatmeal1

I prepare oatmeal packs ahead of time – one container of oatmeal and chia, one of chocolate and cocoa, and one of the almonds.I measure out the vanilla last minute.

The advantage of this division is so I can make different flavor combinations. Sometimes I use walnuts instead of almonds. And sometimes I’m in the mood for cinnamon raisin instead of chocolate.

Cinnamon Raisin Oatmeal Flavor

¼ C Raisins
½ T Brown Sugar
¼ t Cinnamon

Prepare as chocolate oatmeal, but add the above ingredients to the oatmeal before microwaving and omit the chocolate and cocoa.

Posted in Recipe | Leave a comment

Nutella Cresent Star

img_8005

  • Recipe source: http://www.popsugar.com/food/Braided-Nutella-Croissant-Bread-37225124
  • Modifications
    • Used two tubes of ‘big and flaky’ crescent rolls instead of four regular tubes
      • They are cheaper and four tubes seemed like a lot
    • Shaping the dough
      • Not as easy as it looks in the video
      • I tried rolling it, it wasn’t working for me
      • This is more of a bread dough than a cookie dough, so I treated it as such – more pinching and pressing and stretching than rolling
    • Used an 8 inch circle instead of a 10 inch
      • Because I used less dough
      • And I have an 8 inch circle handy
      • And I don’t have a pizza pan, so I had to fit it on a cookie sheet
    • I didn’t use the whole jar of Nutella
      • Because I used less dough
      • Next time, I will use the whole jar
    • Used a tiny Tupperware cup instead of a mason jar
      • Because I used a smaller circle, and because that seemed like a lot of unused dough
    • I did not cut off the excess dough to make a perfect circle
    • Skipped the egg wash
      • Mainly because I forgot


A friend tagged me in a video recipe of Christmas Tree shaped pastry made of puff pastry and Nutella. But I didn’t really like that recipe – I’ve never used puff pastry before, and the shaping of the tree looked unnecessarily finicky. So I searched around and I found this recipe. Then I simplified it even further. I didn’t make it for Christmas, but I did bring it for new years. It was delicious, and big hit. There was none left by the end of the evening.

Posted in Recipe | Leave a comment

Bunny Hat

Child’s Ribbed Blanket Hat with Bunny Ears

I was getting together with some friends for Easter, and I had Easter gifts for the kids. Then, the day before, I realize there was one more kid coming than I had planned for. So, of course, I decide to knit her a hat. Luckily, I have a nice little stash of Blanket Yarn.


Bernat Baby Blanket Yarn – “Pink Twist”

Size 10.5 needles

CO 32 stitches

Knit first and last stitch of every row in stockinet (for seam), knit rest of row in 2×2 rib.
Repeat for about 7.5 inches, then start decreases

Decreases: (keep first and last stitch in stockinet)
*k4, dec,* knit the same stitch as the one below; for decreases, if one of the stitches below is a knit the knit, if both are purl then purl
knit a row in pattern (same stitch as the one below)
*k3, dec*
knit row in pattern
Continue until decreasing every stitch
Cut yarn leaving a long tail. Pull tail through the remaining stitches and use it to sew seam.

20-IMG_6310

I could have stopped there, it took me less then two hours knit up the hat, but I couldn’t shake the thought of how cute it would be with little bunny ears. (The ears took about twice as long as the hat.)

21-IMG_6312

My first ear looked a bit more Yoda-like than bunny-like. I went back to Google and decided that I needed to alter the shape (more tear drop, less pointy) and that I needed a contrasting color for the underside of the ear. The second ear came out adorable.

Ears:

(‘back’ of ears is the underside, ‘front’ is the top)
Pick up 4 stitches on the hat, right below start of decreases
knit all in stockinet
knit 3 rows
pick up 4 stitches from the back of the ear on a second needle and start knitting in the round
knit one row
on back of ear: k1 mc, k2 cc, k1 mc (continue mc for entire front of ear)
continue about 2 inches
Increase:
on front inc 1st and last, on back inc 1st and last stitch in mc
you should now have 6 stitches on each needle. At this point you may want to split the front to 2 needles, 3 on each
back: k1 mc, k4 cc, k1 mc
continue about 2 inches
Decrease:
on back  dec 1st and last in mc, front: dec 1st and last. Leaving 4 st in front and 4 in back
cut cc and continue only in mc
k 1 round
dec 1st and last on each side, leaving 2 on each side
dec front and back leaving 1 on each side
cut yarn and pull through remaining two stitches
stitch in tails

Repeat on opposite side of hat.

22-IMG_6313

23-IMG_6315

Next time: Make it a little wider: co 38. It fits alright as is, but because of the way it stretches it gets a bit of a cone-head effect. I could make it shorter instead, but I like the idea of leaving some room to grow.

24-IMG_6317


The ears were worth it; it looked super adorable on her.

Posted in Knitting | Leave a comment

Cow-Dog Plushie

There’s a kid I know, and I’m pretty sure he has a knitting curse. Nothing I have tried to knit for him has turned out how I planned, starting with the baby blanket. After two tries at a minion hat this summer, I skipped a knitted gift for Christmas and got out the sewing machine (that turned out awesome).

I knit a baby blanket for his incoming baby brother, so I was determined to try again. My specialty is hats, but he’s not really fond of hats (which may be part of my problem), so I’ve had an idea for a while to knit him a stuffed animal. I already failed at that the Christmas before last, but I’ve been making a bunch of tiny monster toys since then, so I gave it another go.

I knit most of it at a knitting retreat, and I was really happy with it. Most of the people I was with looked at it, and asked if I was making a cow, and I happily responded that yes, I was making a cow. I loved how it turned out and thought it was one of the most awesome things I’ve ever made.

Then I took it with me the next time I saw my mom, and proudly showed it off. Her response: “Well…At least it’s recognizable as a dog.” She’s not the only one that thinks it’s dog. I think the main problem is the torso is too long. The tail sticking up doesn’t help any (I didn’t mean for it to do so). My mom blames the ears, says they’re too big. Actually, she first blamed the color, because it’s not the right color for a cow … because dogs are green and blue? I thought about adding horns or an udder, but I’m not sure I could pull either off convincingly, and I’d need to add another color.

Anyway, I still think it’s pretty cool, and I’m willing to go along with it being a dog. Besides, it’s not my fault; the kid is cursed.


14-IMG_6268 13-IMG_6262 12-IMG_6261 11-IMG_6260 10-IMG_6258

Posted in Knitting | Leave a comment

Folly Cosplay: Shirt

“Her grey shirt was made of ethersilk, patched in several places, and looked as though it had been tailored for a man almost two hundred pounds heavier than she was.”

I started looking for the shirt early; I was checking thrift stores for large, grey, button down shirts, preferably something silky. I hadn’t found anything close, until I mentioned it to my family one day. It turns out that my brother had the perfect shirt in a pile of clothes he was getting rid of.

img_7346

All that’s left was sewing on some patches. I figured that an ethersilk shirt would most likely be patched with ethersilk, so I looked for silky fabric to patch it with. I found some appropriate shirts half-off from Goodwill. I went with bold colors, because I figured that Folly would patch her clothes with whatever seemed ‘appropriate’ at the time. I used the same logic when choosing thread to sew the patches on, and I didn’t stress too much about keeping the stitches even. I even switched thread colors in the middle of sewing on some patches.


Posted in Cosplay, Folly Cosplay | Leave a comment

Butterfly Scarf

I wanted to knit something with butterflies. So I went to the internet. Turns out there’s a stitch called the butterfly stitch.*

01-IMG_3447

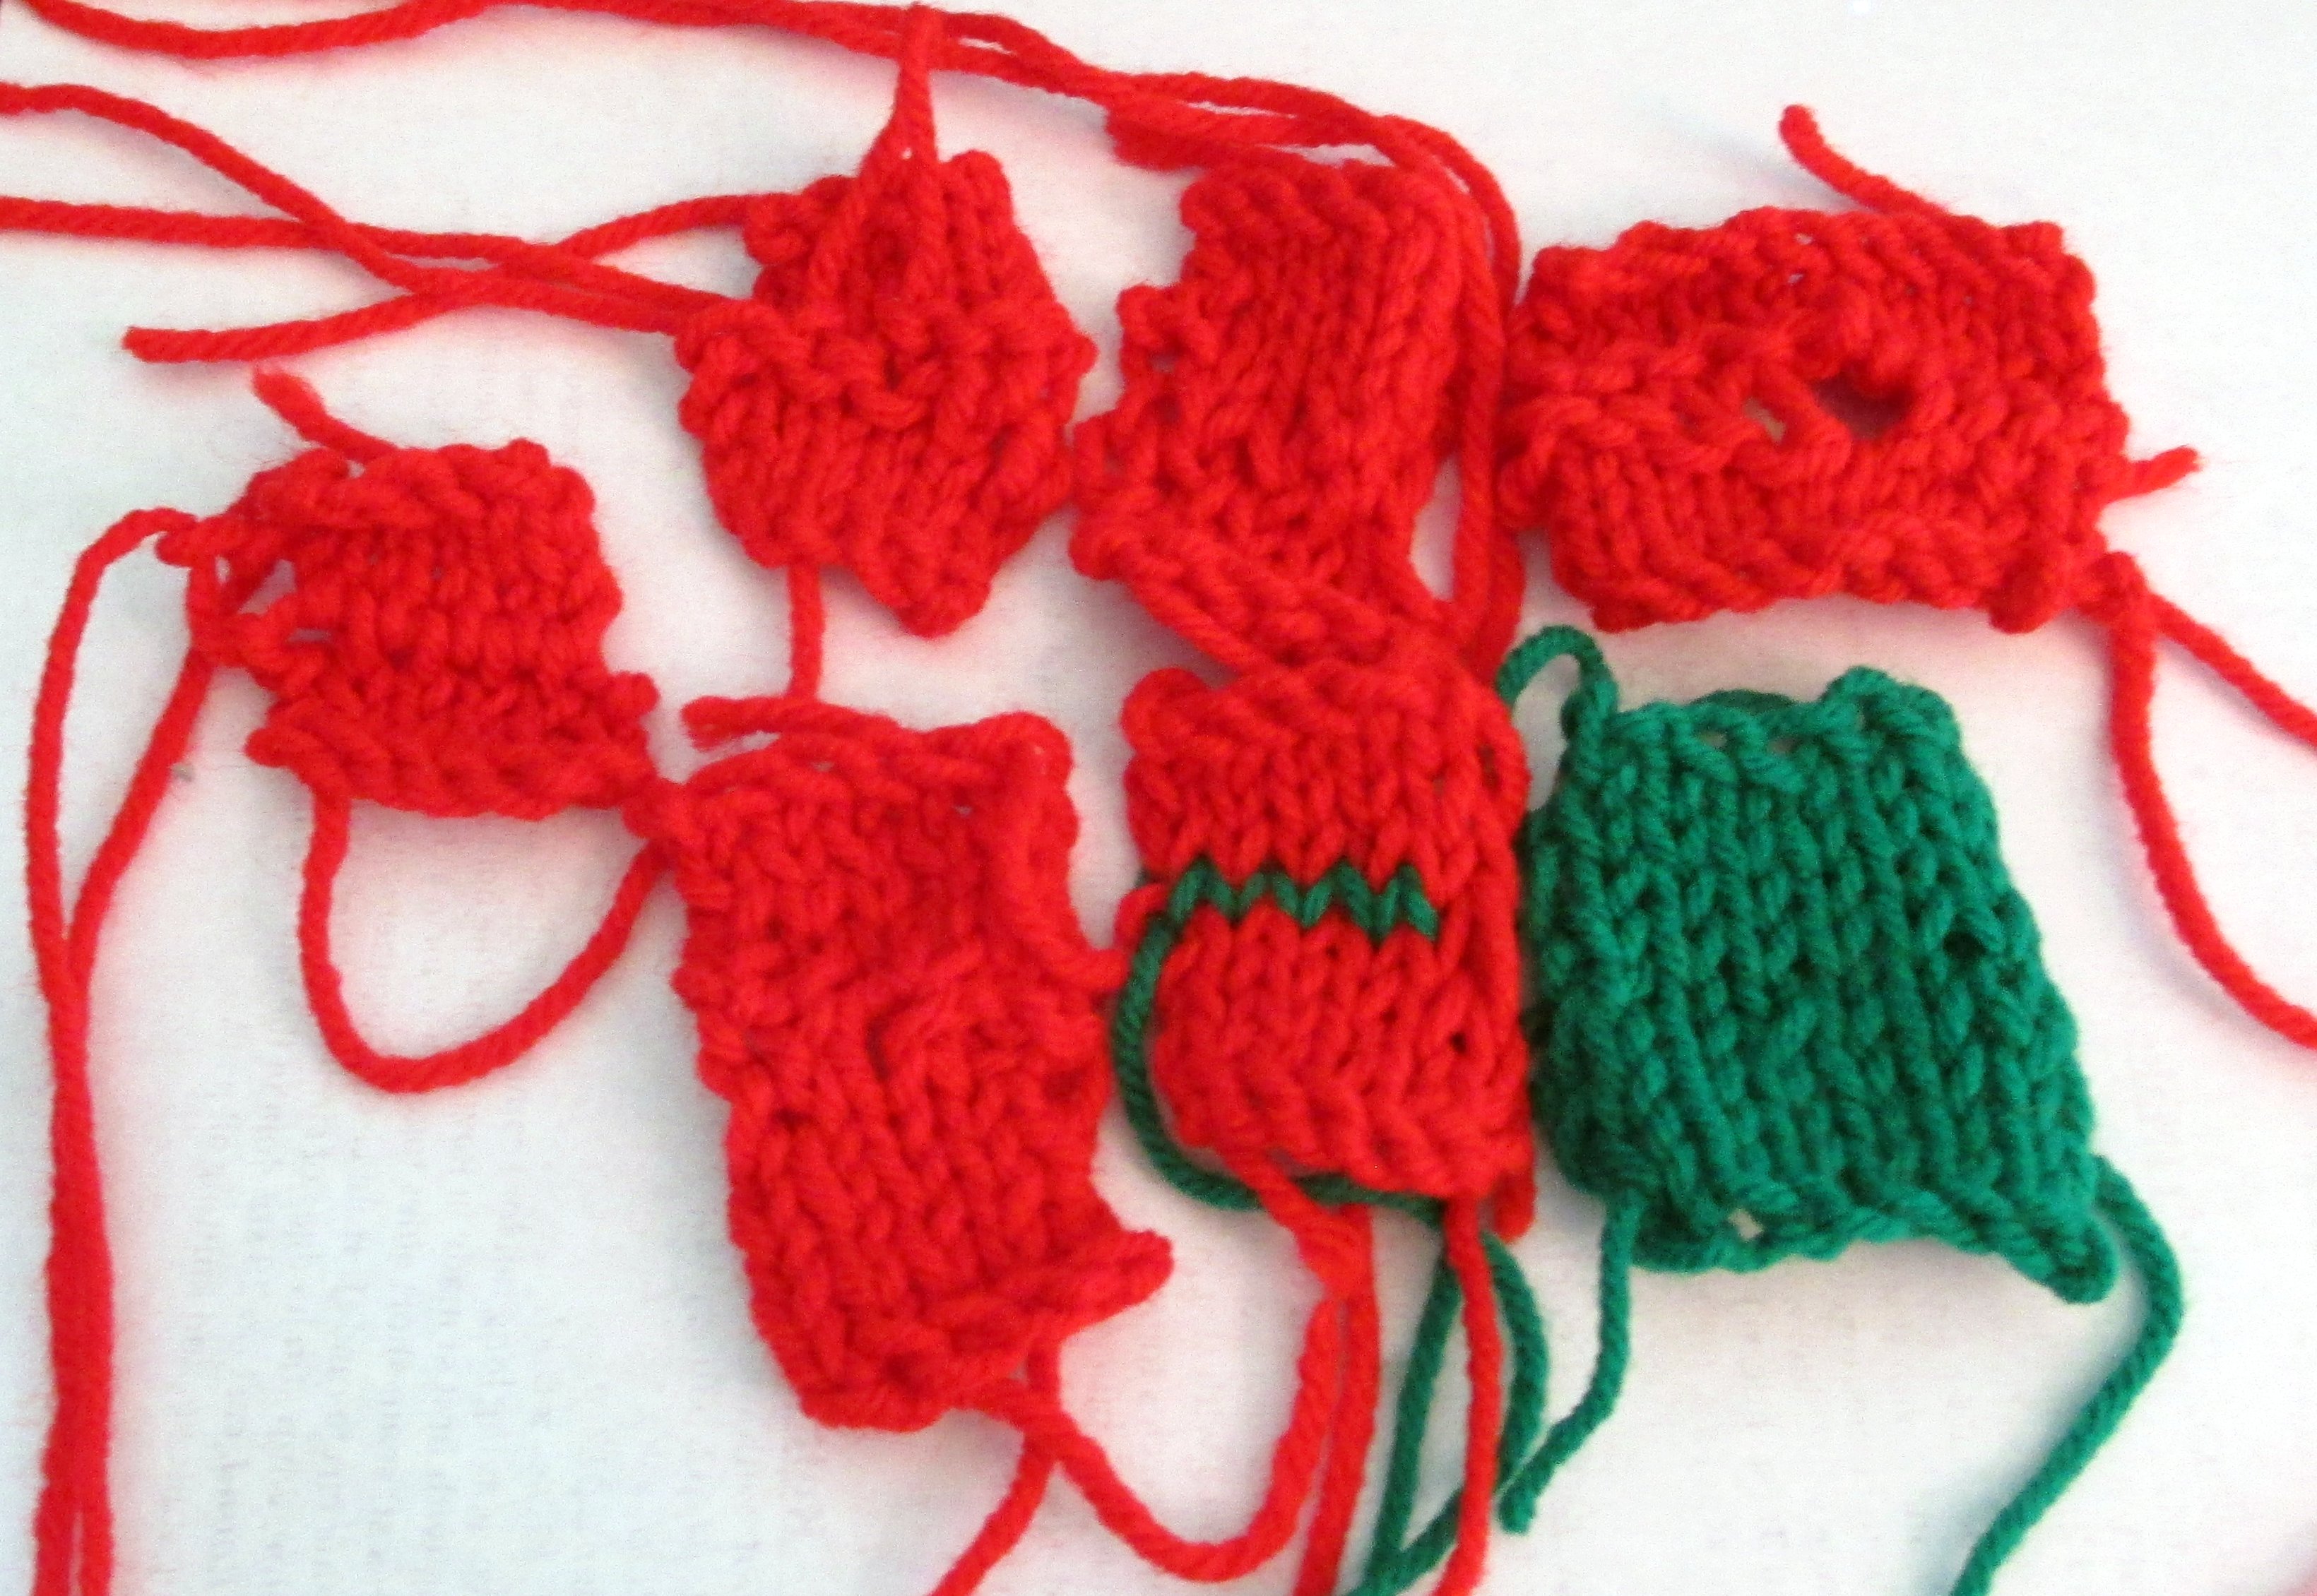
It wasn’t exactly what I had in mind at first, and was completely different from anything I’d done before, but it grew on me. I knit a few practice swatches, and experimented a little with different dimensions for the butterflies.

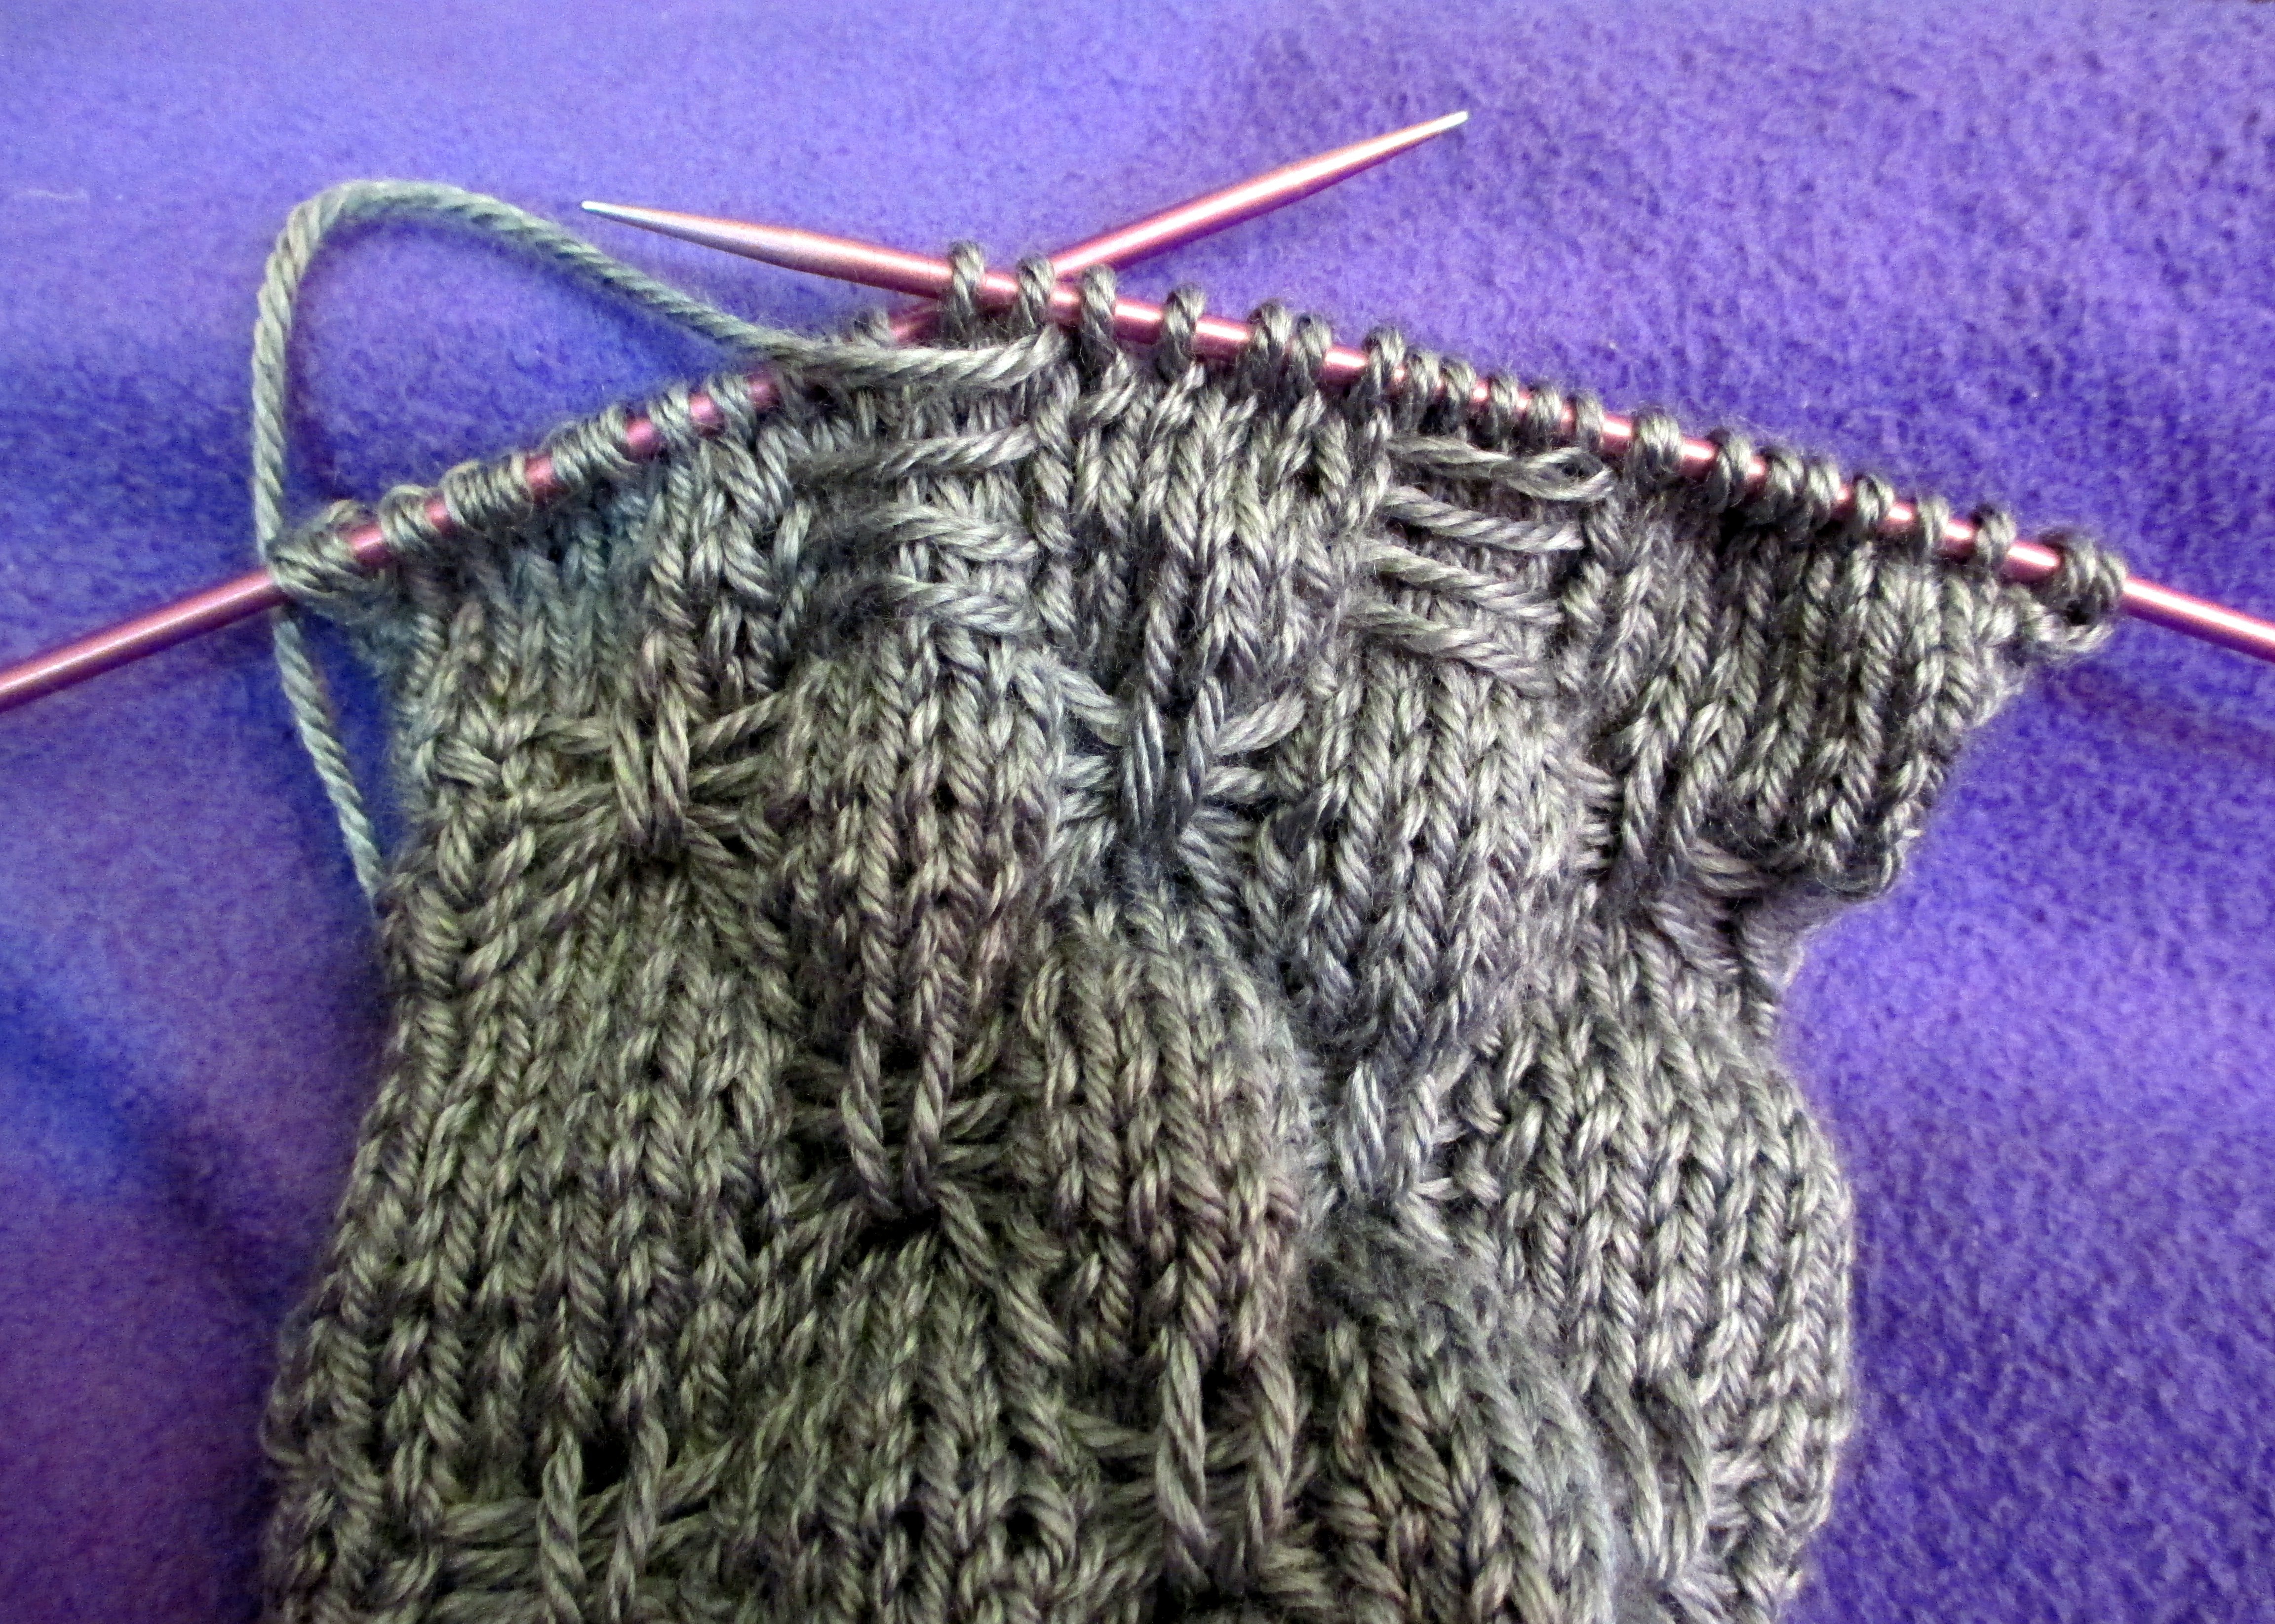
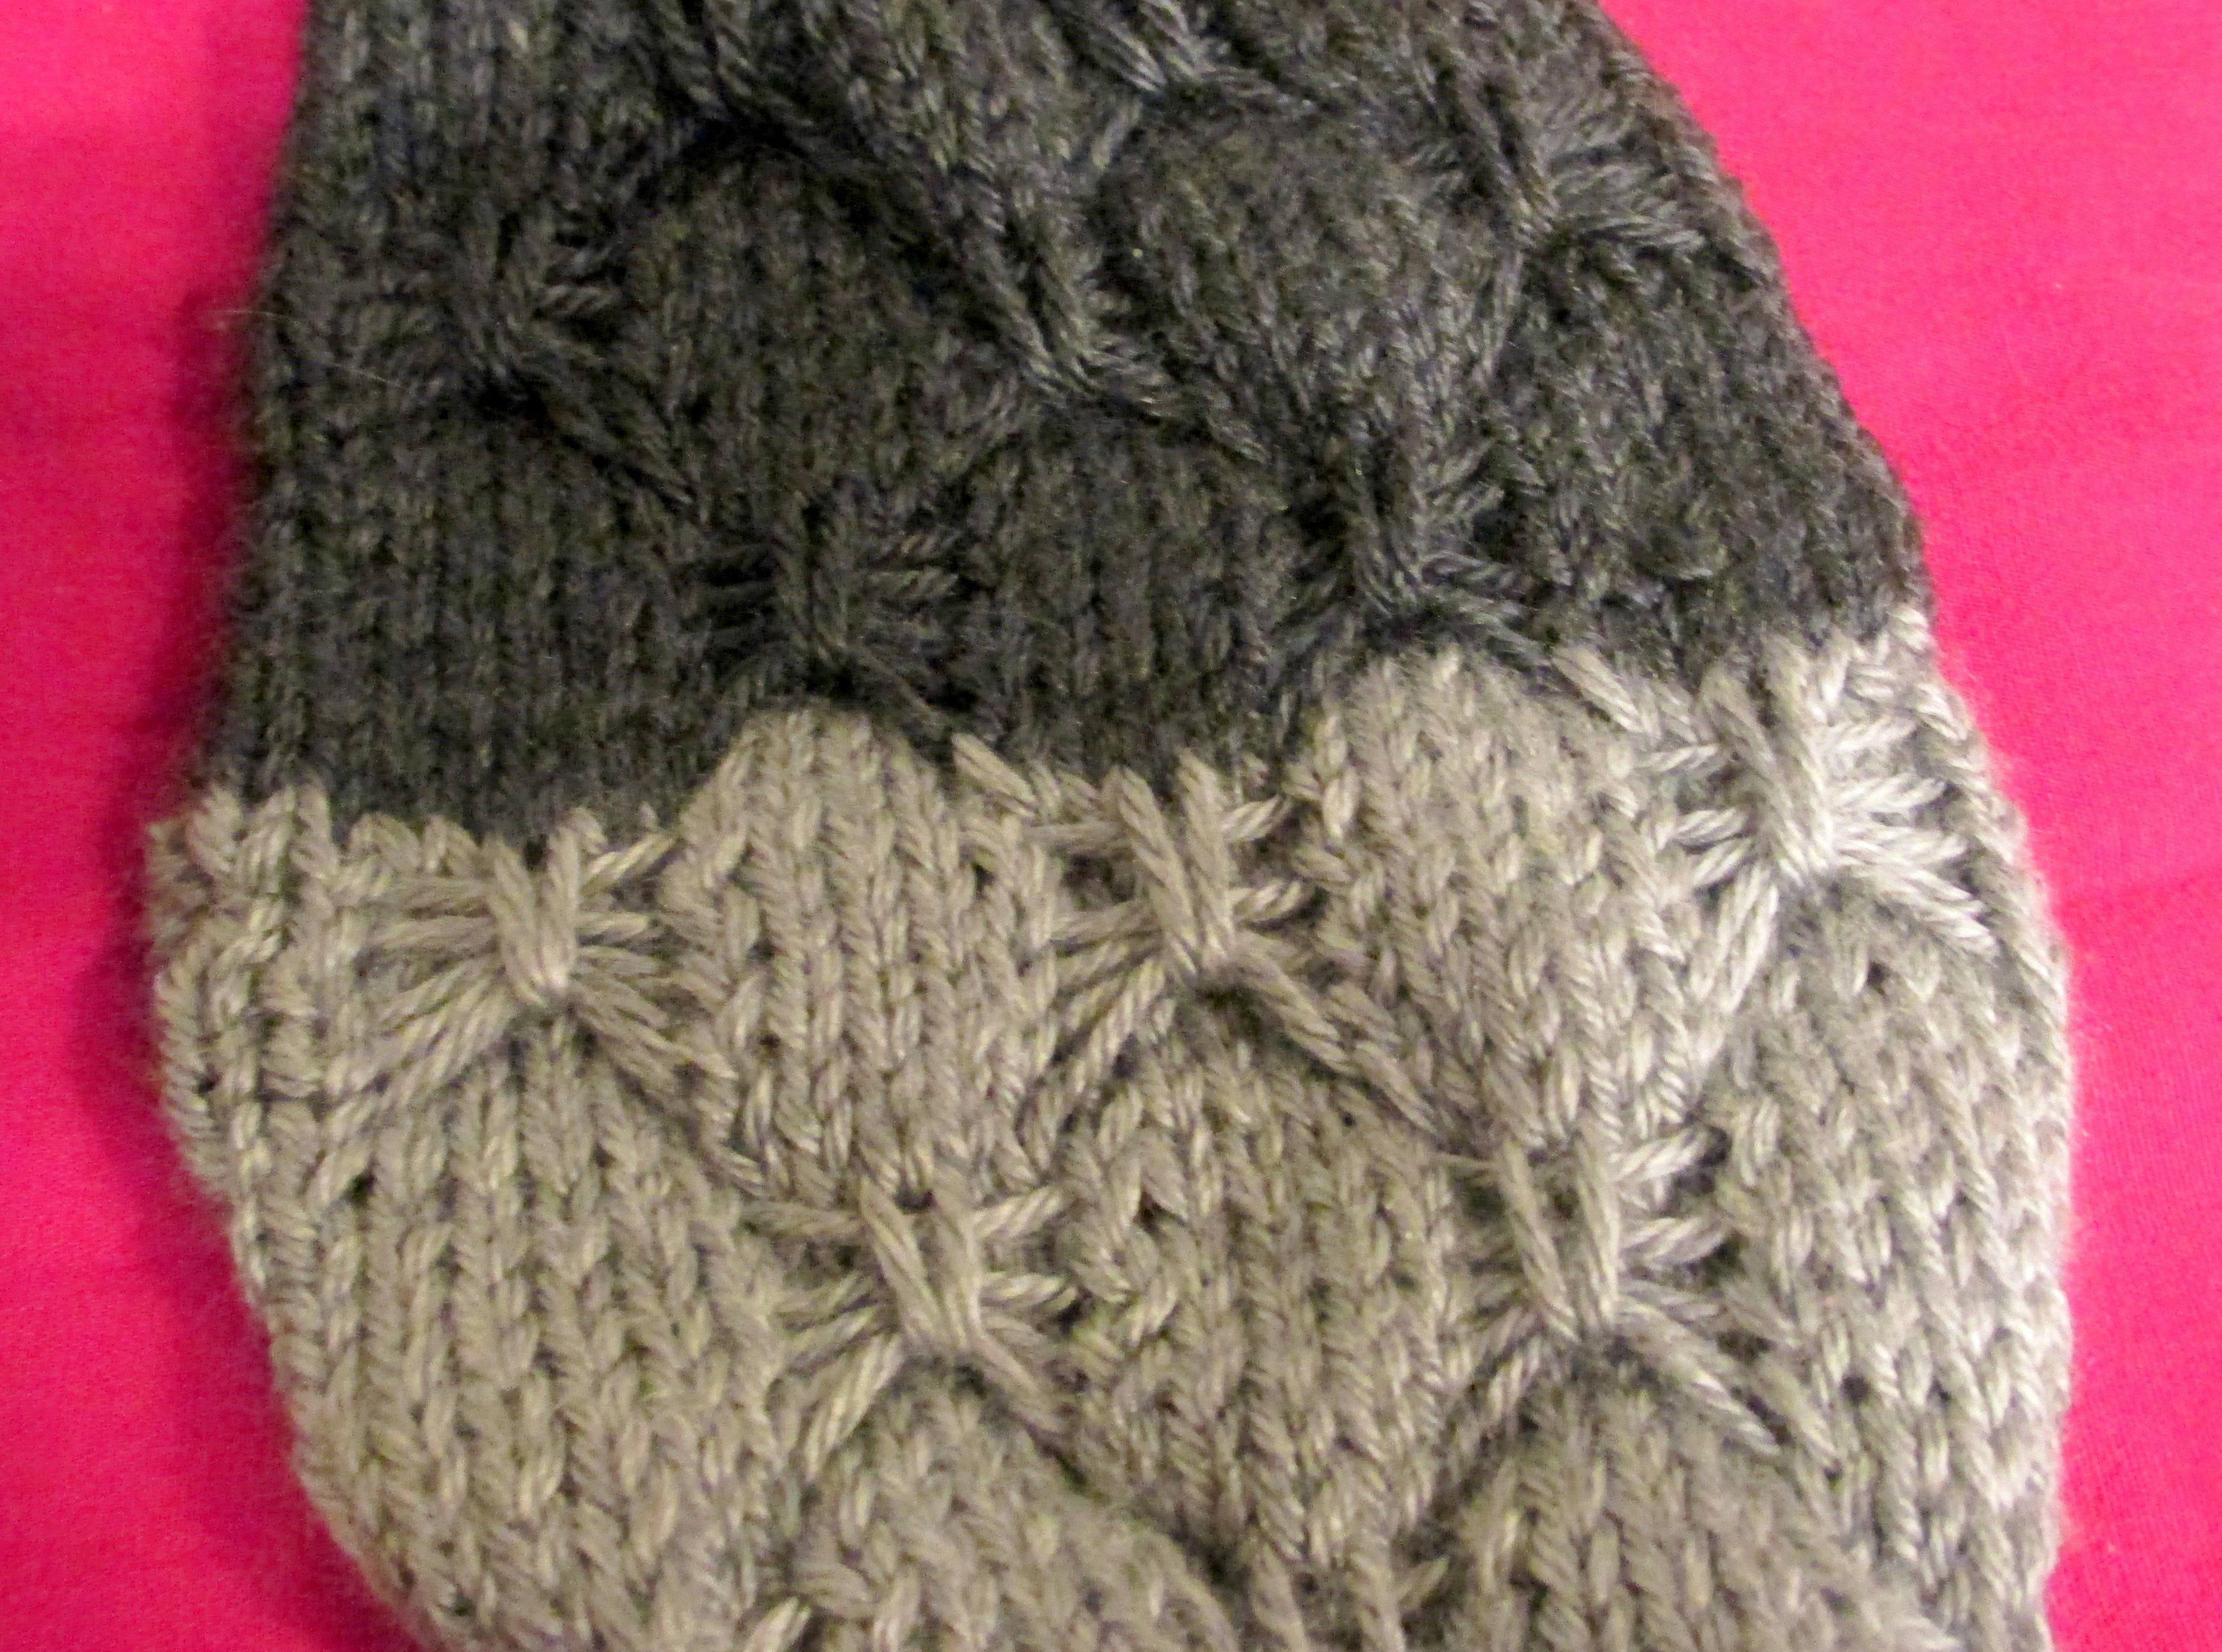
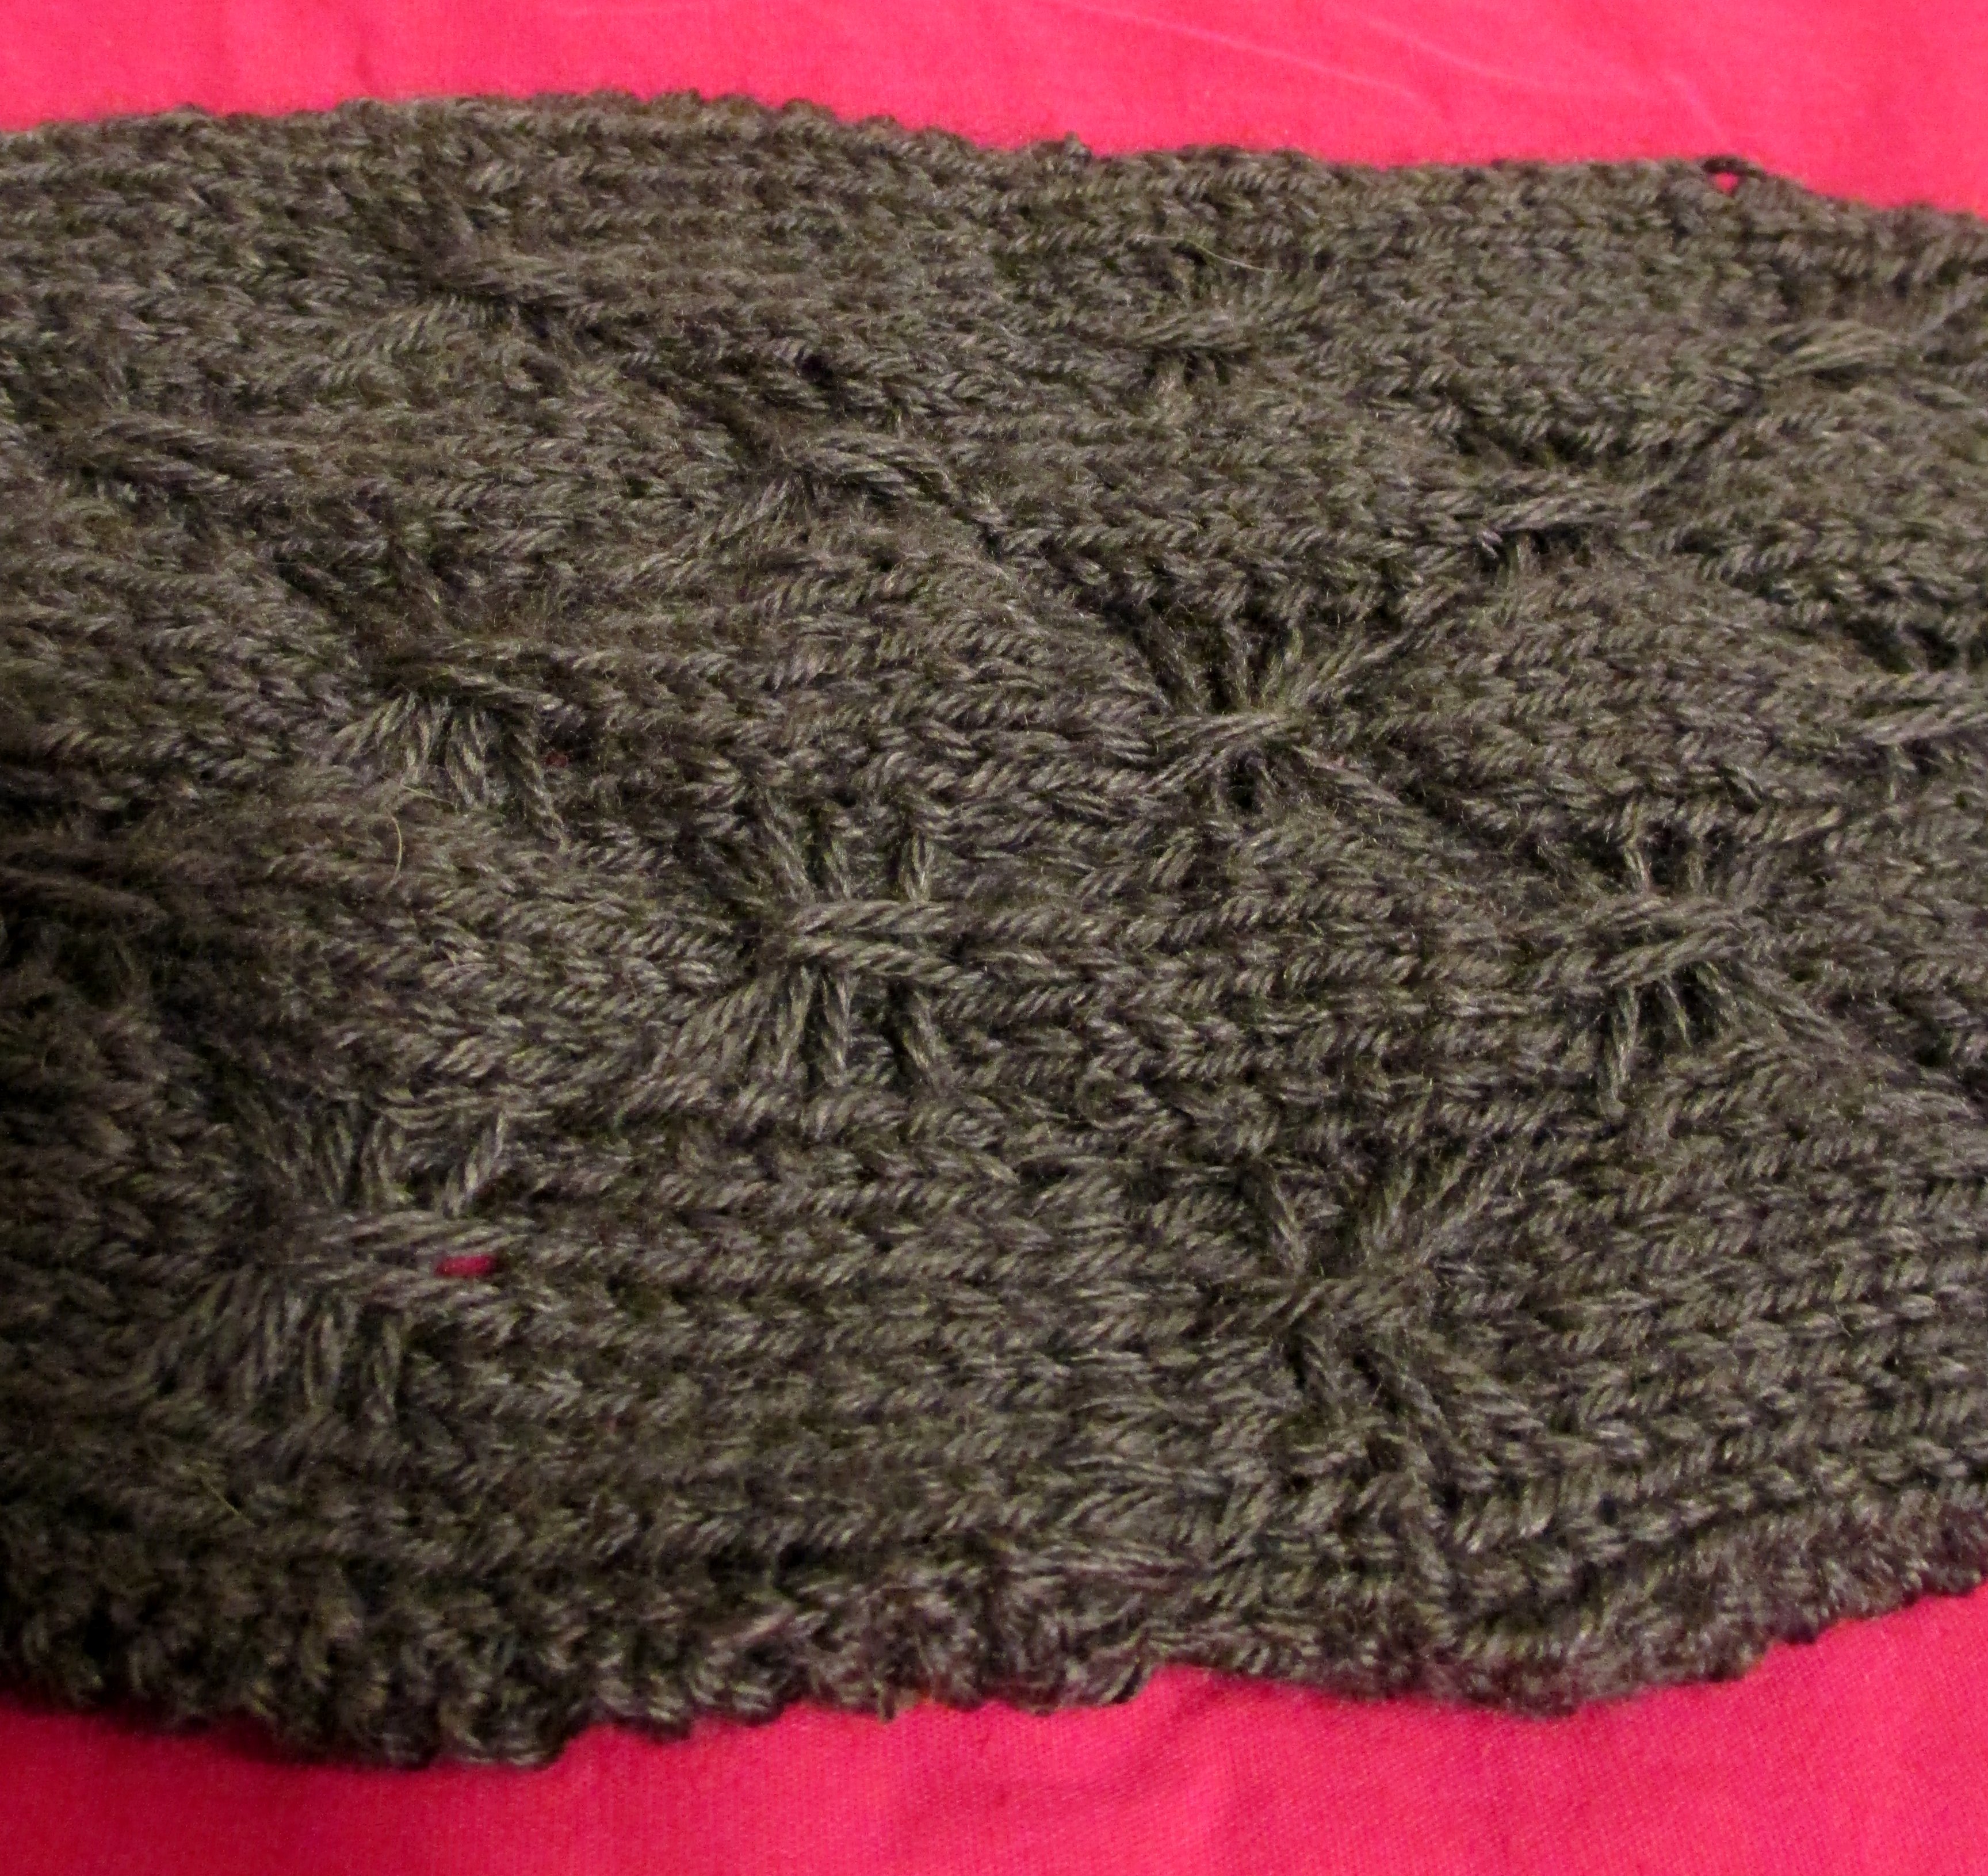
I settled on the original pattern – 5 stitches wide and 5 repeats tall. (by repeats, I mean visible strands in the butterfly wings – one row of slipping, one of knitting, well, purling.) The butterfly needs to be an odd number of stitches wide, in order to get the head in the center. I didn’t want any wider, so I tried three stitches wide but it didn’t look right. It was disproportionate and the strands were too narrow to be noticeable.

I did try three wide by three tall, but those looked more like ants than butterflies. Regardless of width, three strands tall looks more like insects.

I tried the top and bottom strands five wide and the middle strand three wide, to make them look more like a butterfly, but it didn’t work out, The middle strand wasn’t noticeable enough. One of these actually stayed in the final scarf.

04-IMG_3906

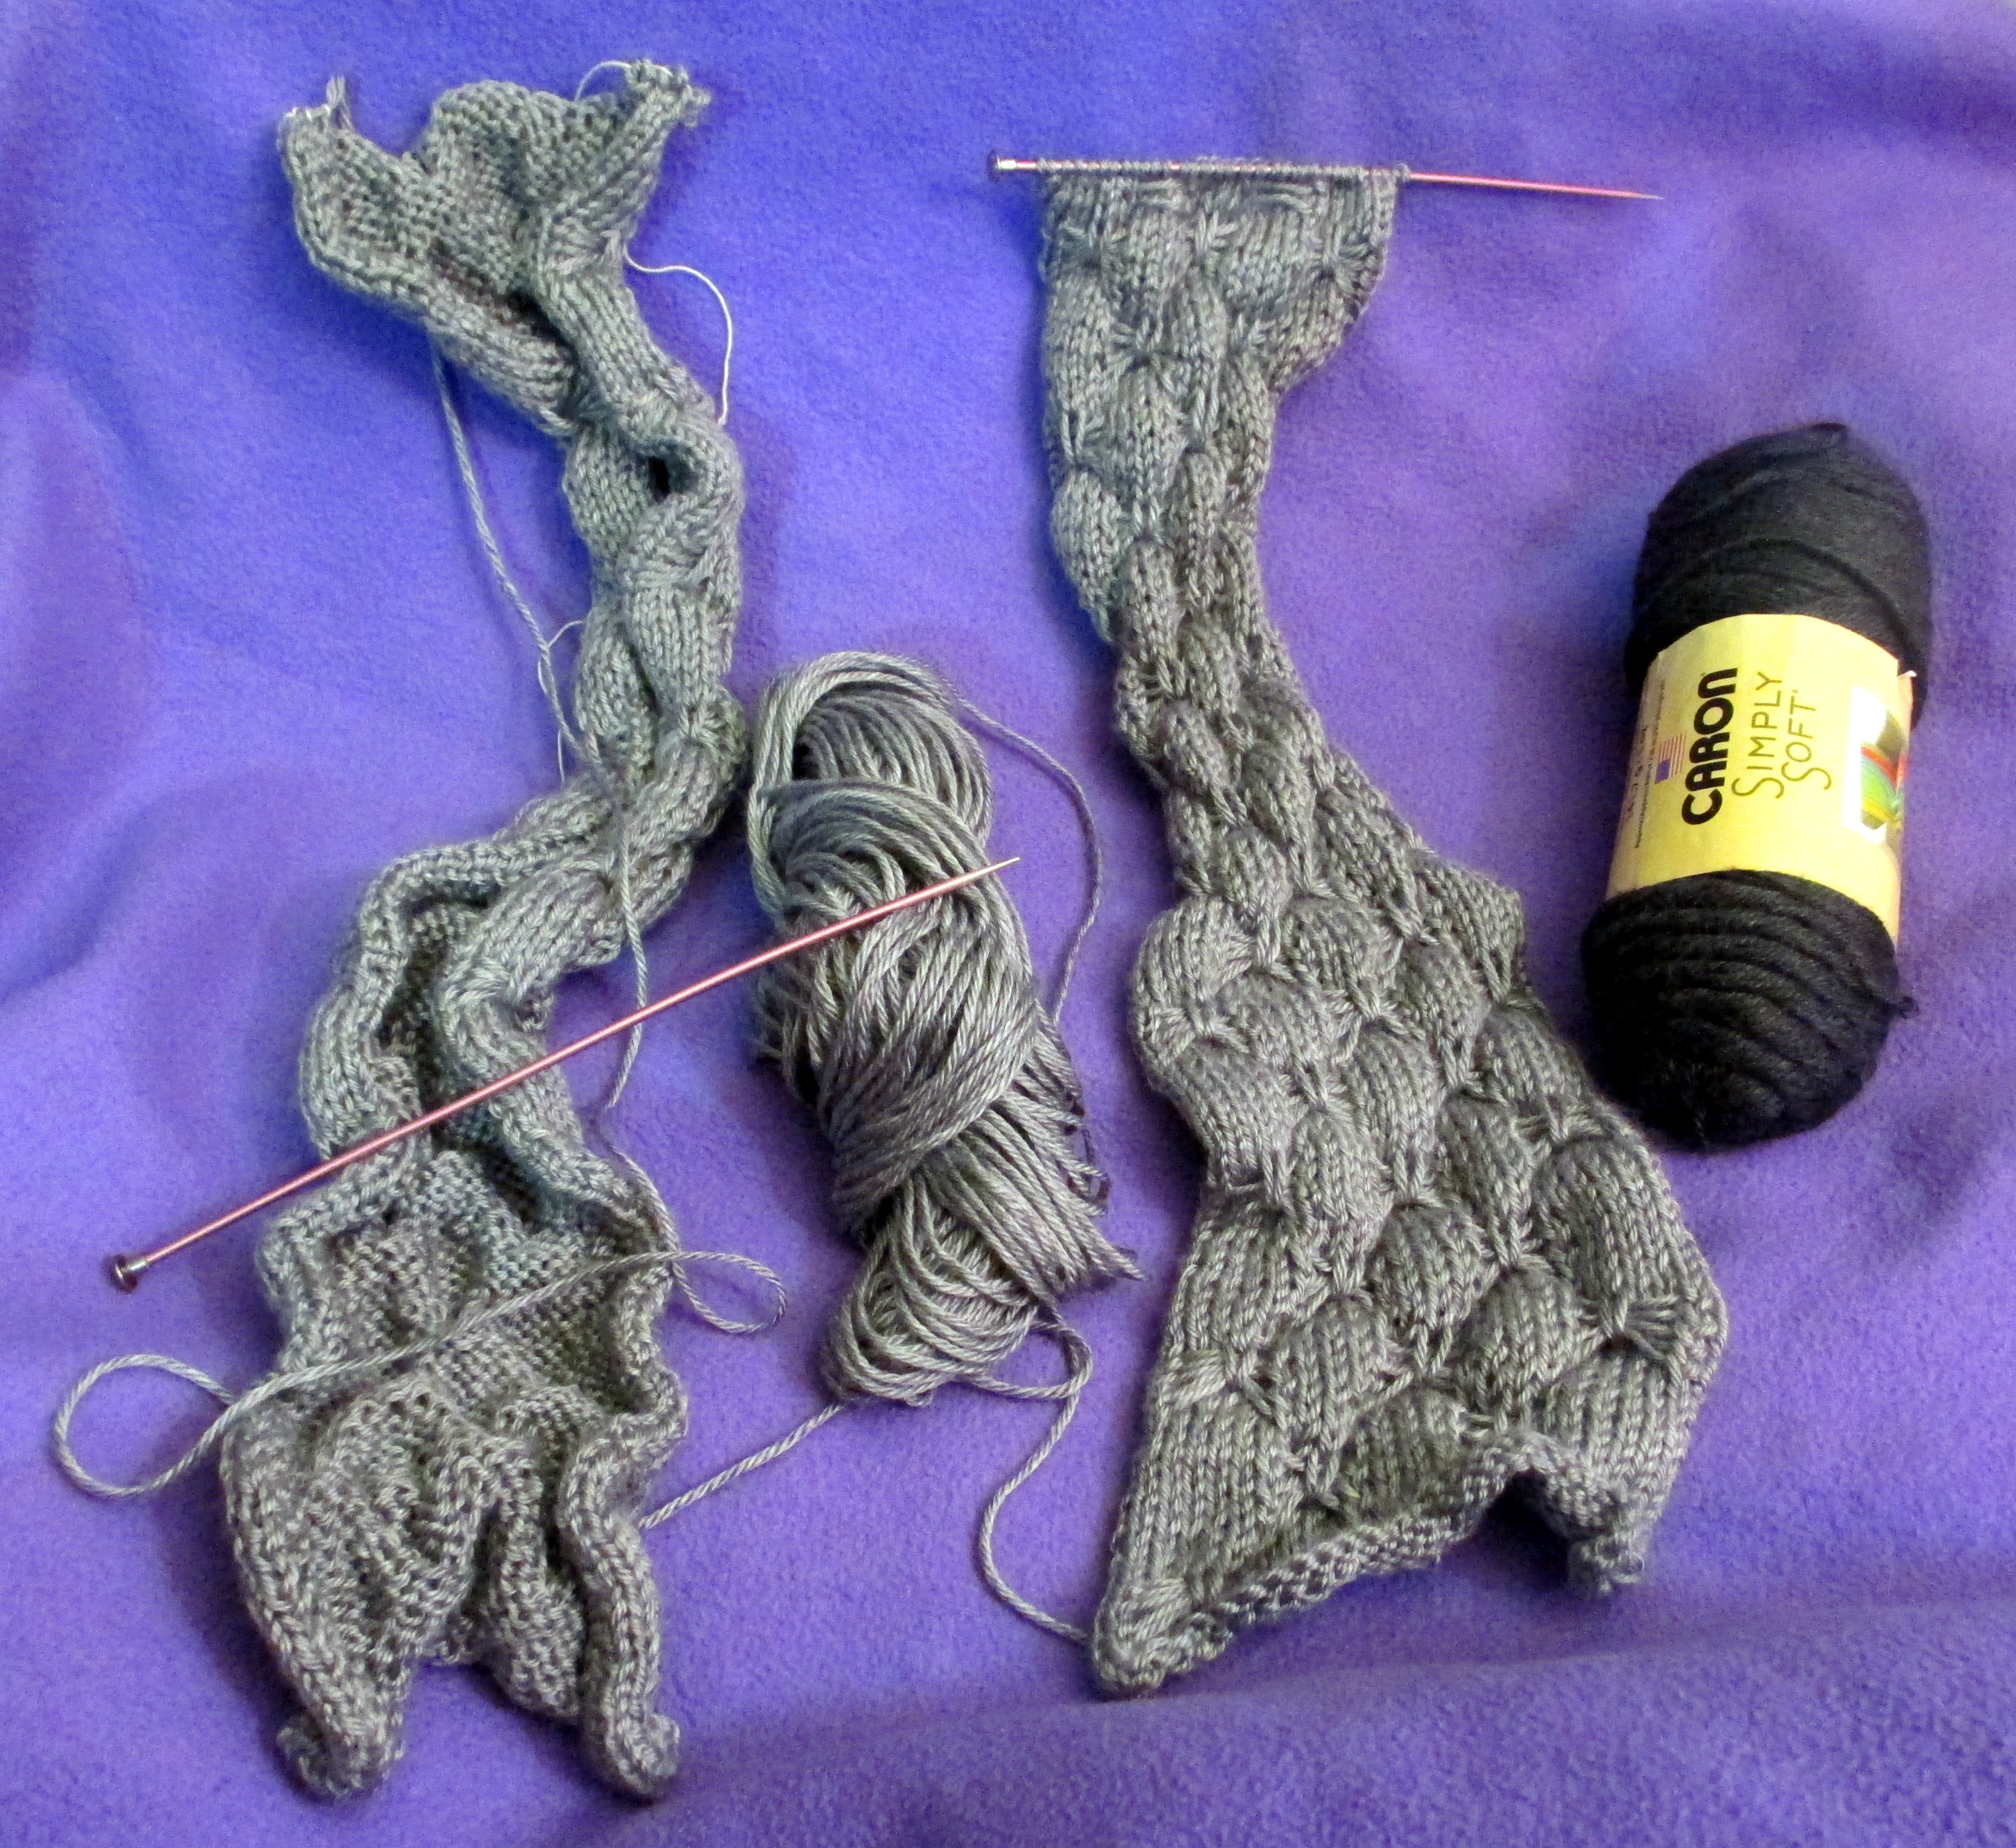
Yarn: Caron Simply Soft (medium weight): 1 skein Soft Grey Heather (silver), 1 skein Charcoal Heather (darker grey)

CO 5 x 5 + 8 = 33
Stockinette first few rows
Stitches 1, 2, 32, 33: garter stitch
Stitches 3, 4, 30, 31: stockinette
The middle stitches: Butterfly stitch, 5×5, start with 3 butterflies. So, butterfly 5 stitches, stockinette 5, butterfly 5, stockinette 5, butterfly 5; the next set of butterflies stockinette 5, butterfly 5, stockinette 5, butterfly 5, stockinette 5.

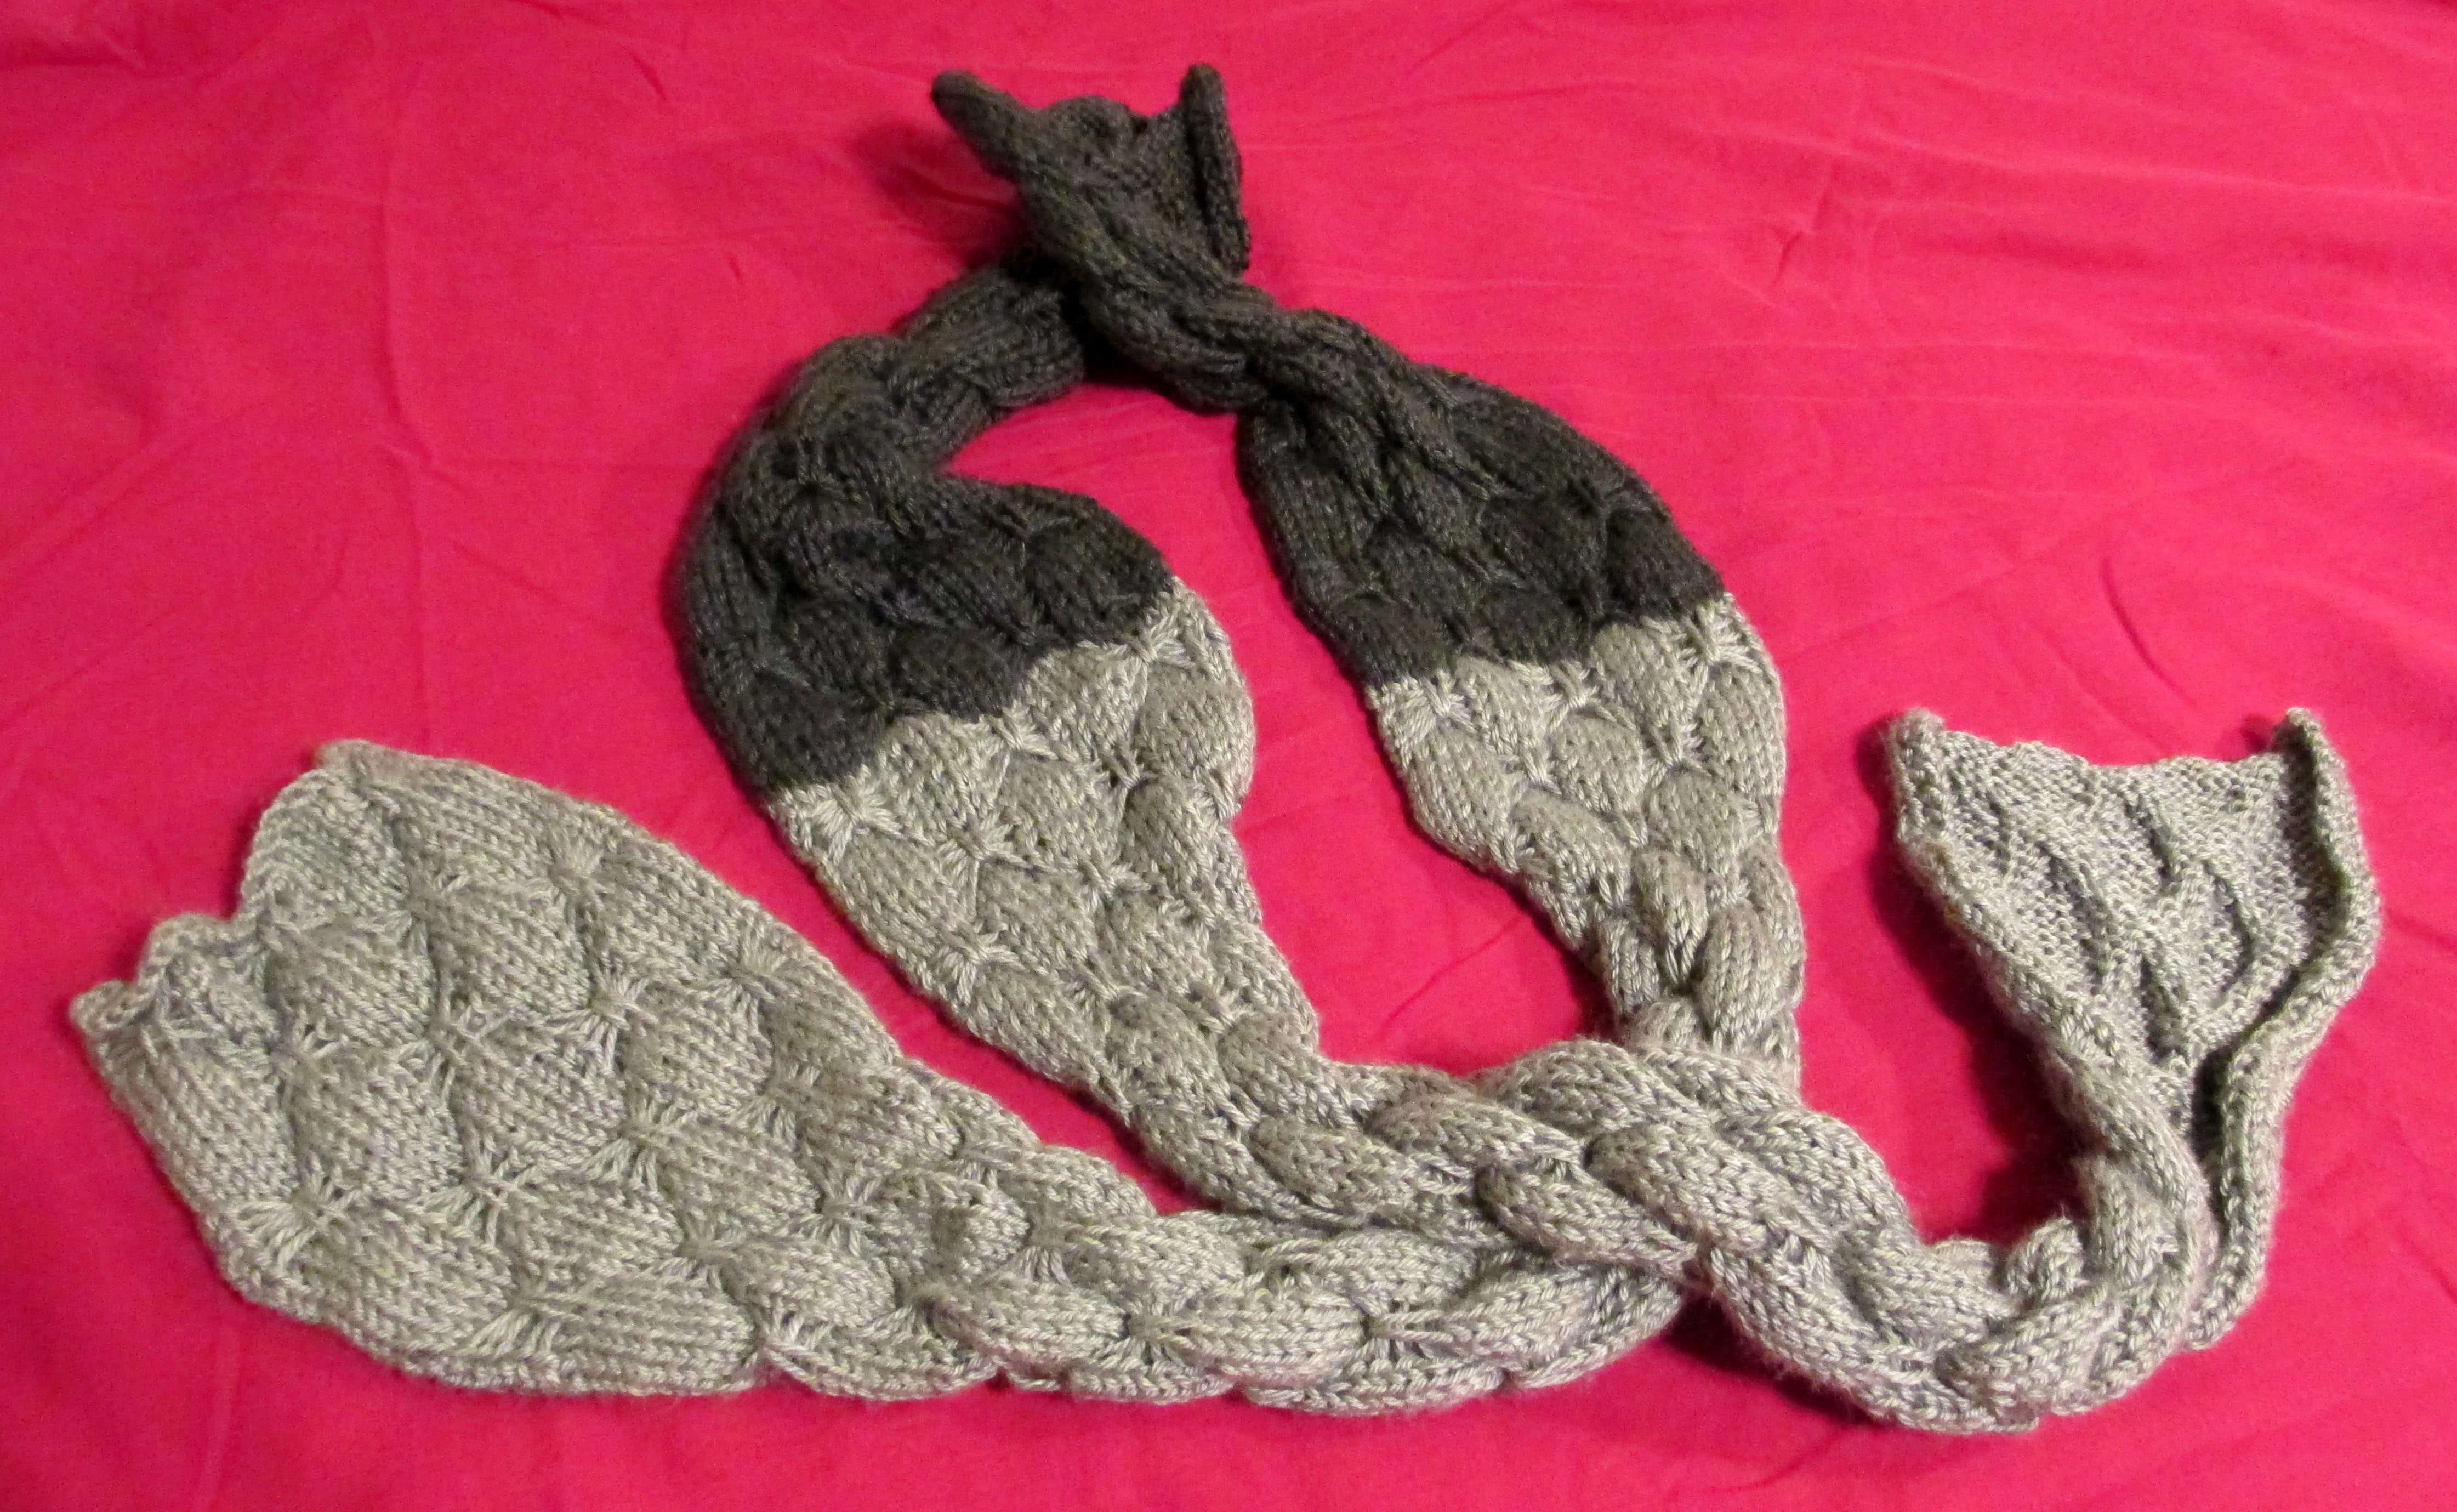
Knit half the scarf, then put it on a stitch holder and knit the other half (so the butterflies face the same direction).

02-IMG_3446

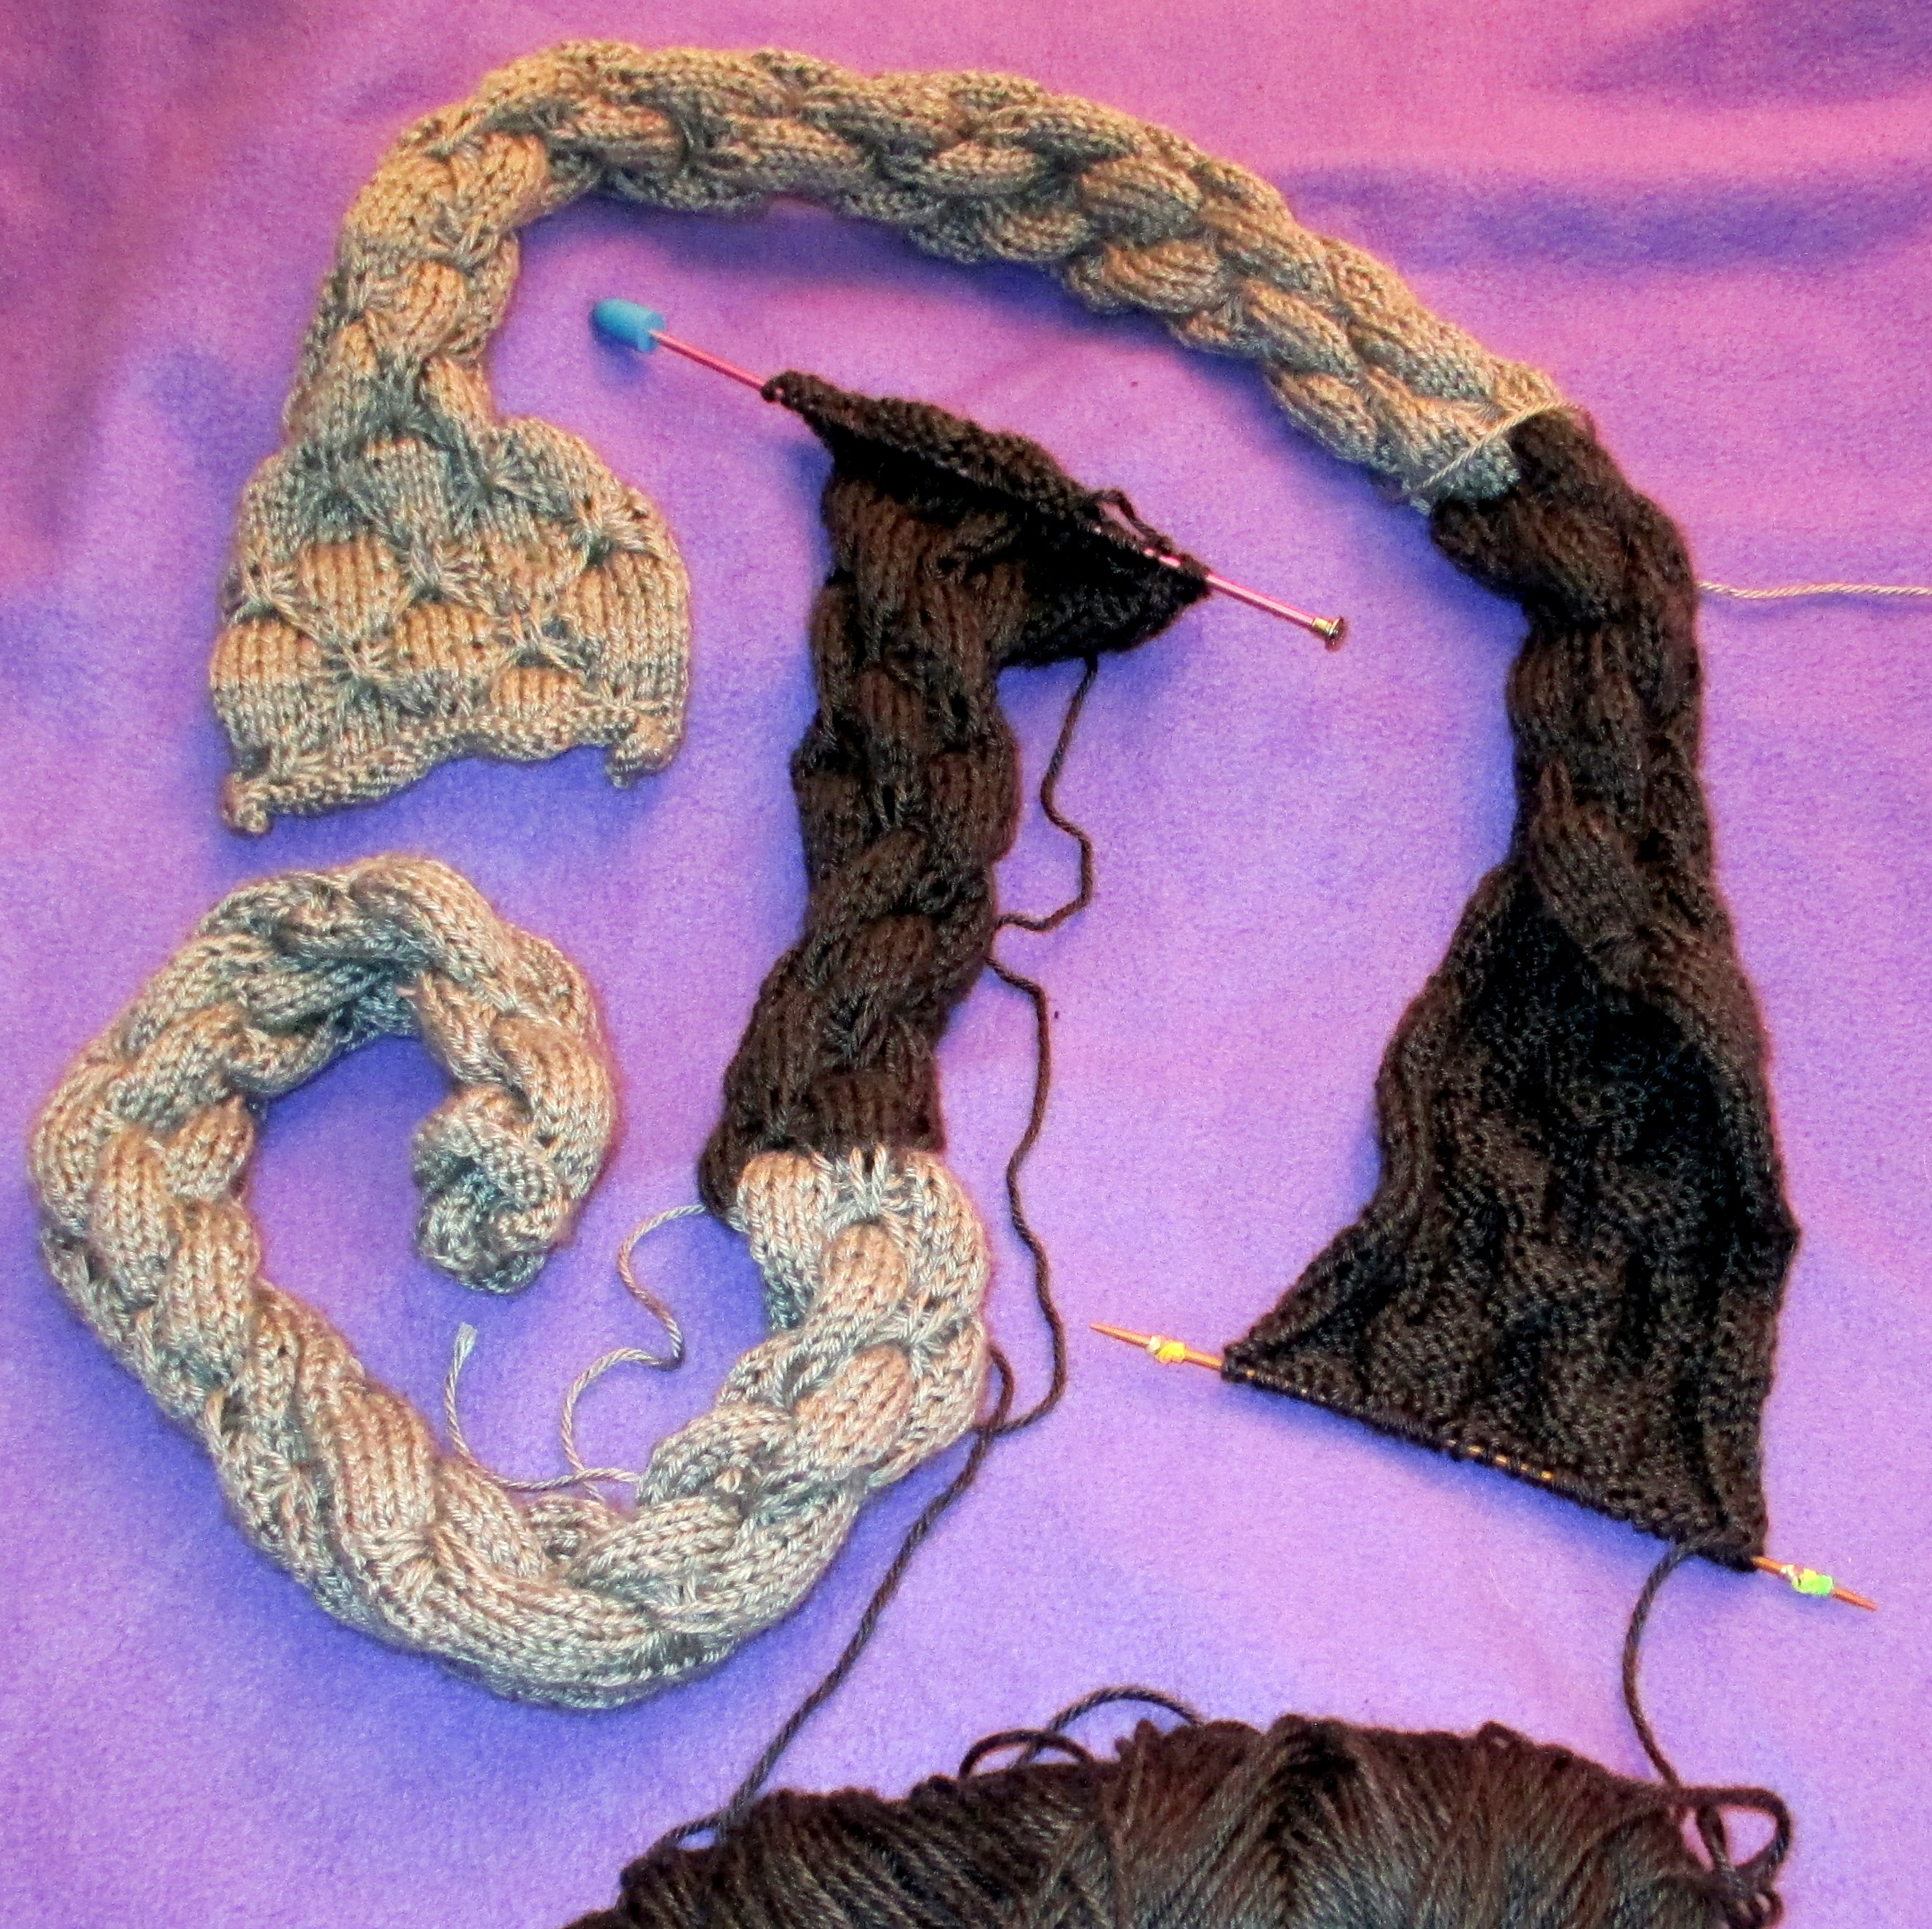
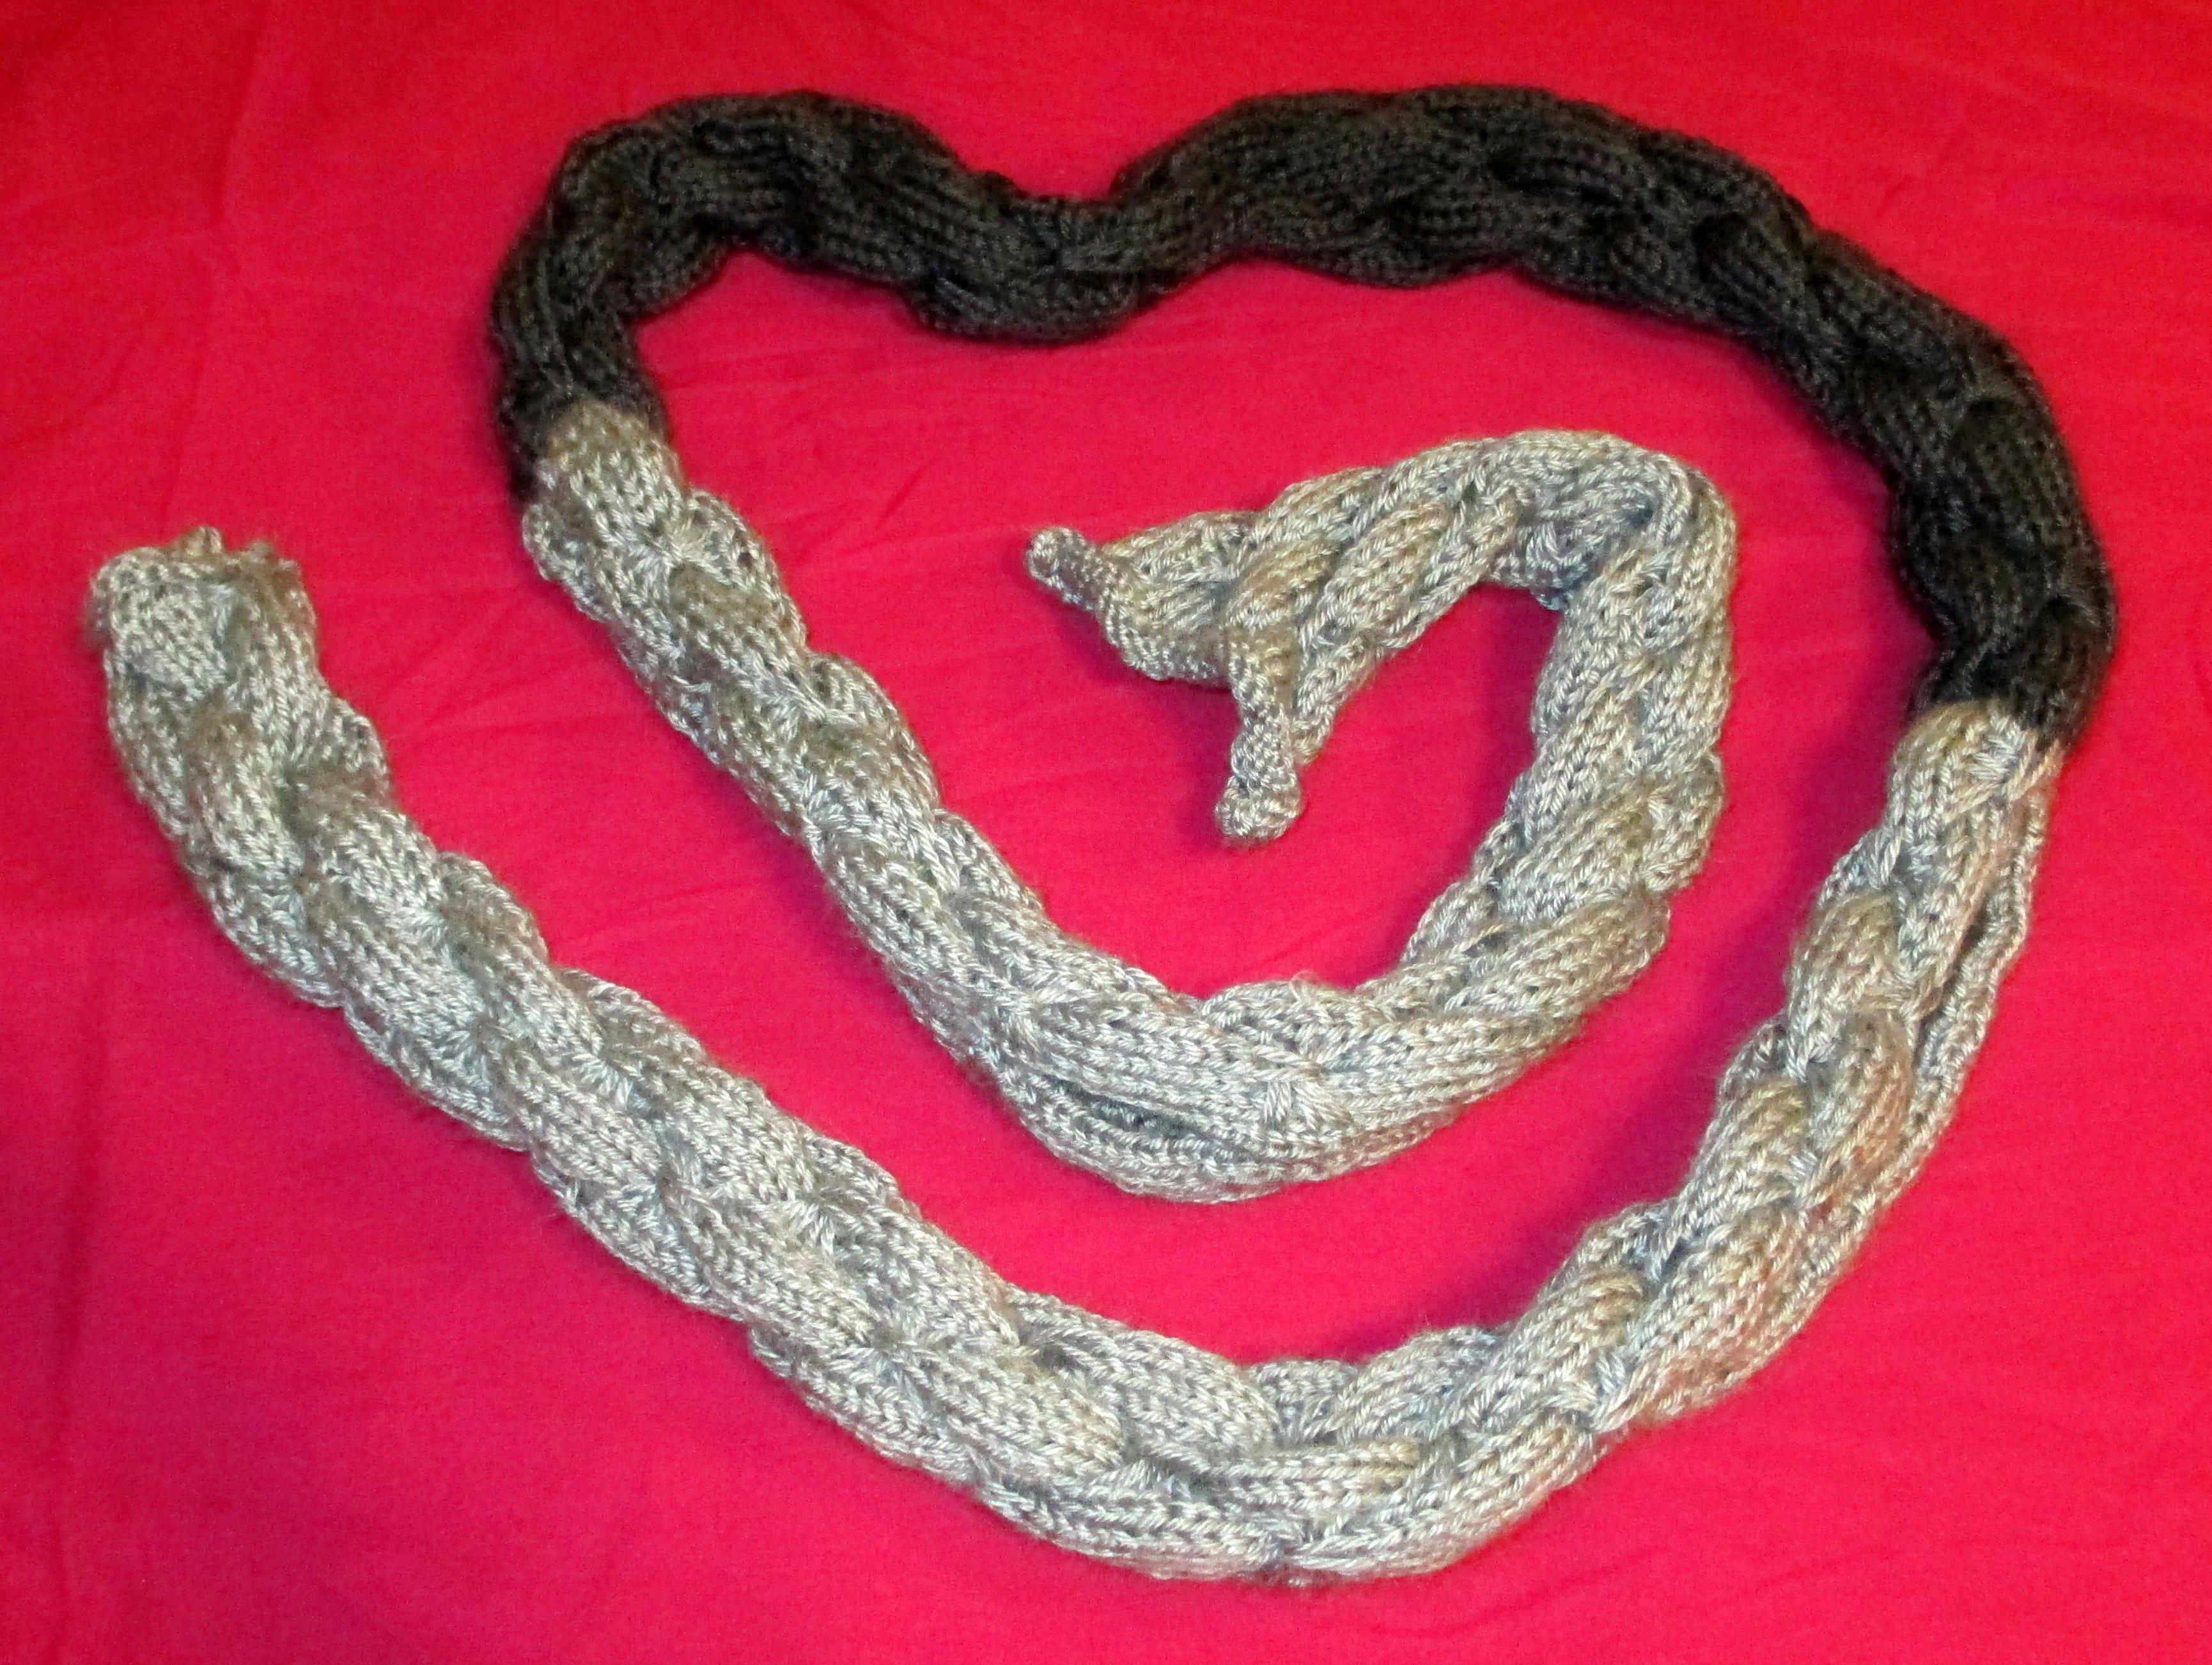
I originally planned to do the entire scarf in silver, but I realized that I wouldn’t have enough yarn to make the scarf as long as I wanted it. I considered buying another skein, even if the dye lot would be different, but then I settled on using a contrasting color instead. In the end I like it better this way. I really like how the color join turned out.

03-IMG_3608  05-IMG_3806

The hardest part ended up being joining the two halves of the scarf. I’d used the kitchener stitch once before, but I didn’t have it quite right. I didn’t really care at the time, because it was in an inconspicuous location, but for this I really wanted the join to be smooth. I practiced quite a few times until I got it right. The key for me ended up being working on the wrong side – the purl side – instead of the right side, and practicing using a contrasting color to stitch the pieces together, so that I could see my work.

06-IMG_3998

In the end, the join turned out beautiful. I have to check the direction of the butterflies to make sure I have the right place.

07-IMG_3808

08-IMG_3805 09-IMG_3802

I intended this scarf to be a Christmas gift. I did start it before Christmas, but I didn’t finish it until…much later. Part of the problem is that the pattern is repetitive enough to be boring after a while, but complex enough that I can’t do it without looking. So working on it in venues like a movie theater is not an option. Then it took me a few more weeks to master the kitchener stitch for the join.

10-IMG_3766 11-IMG_3784

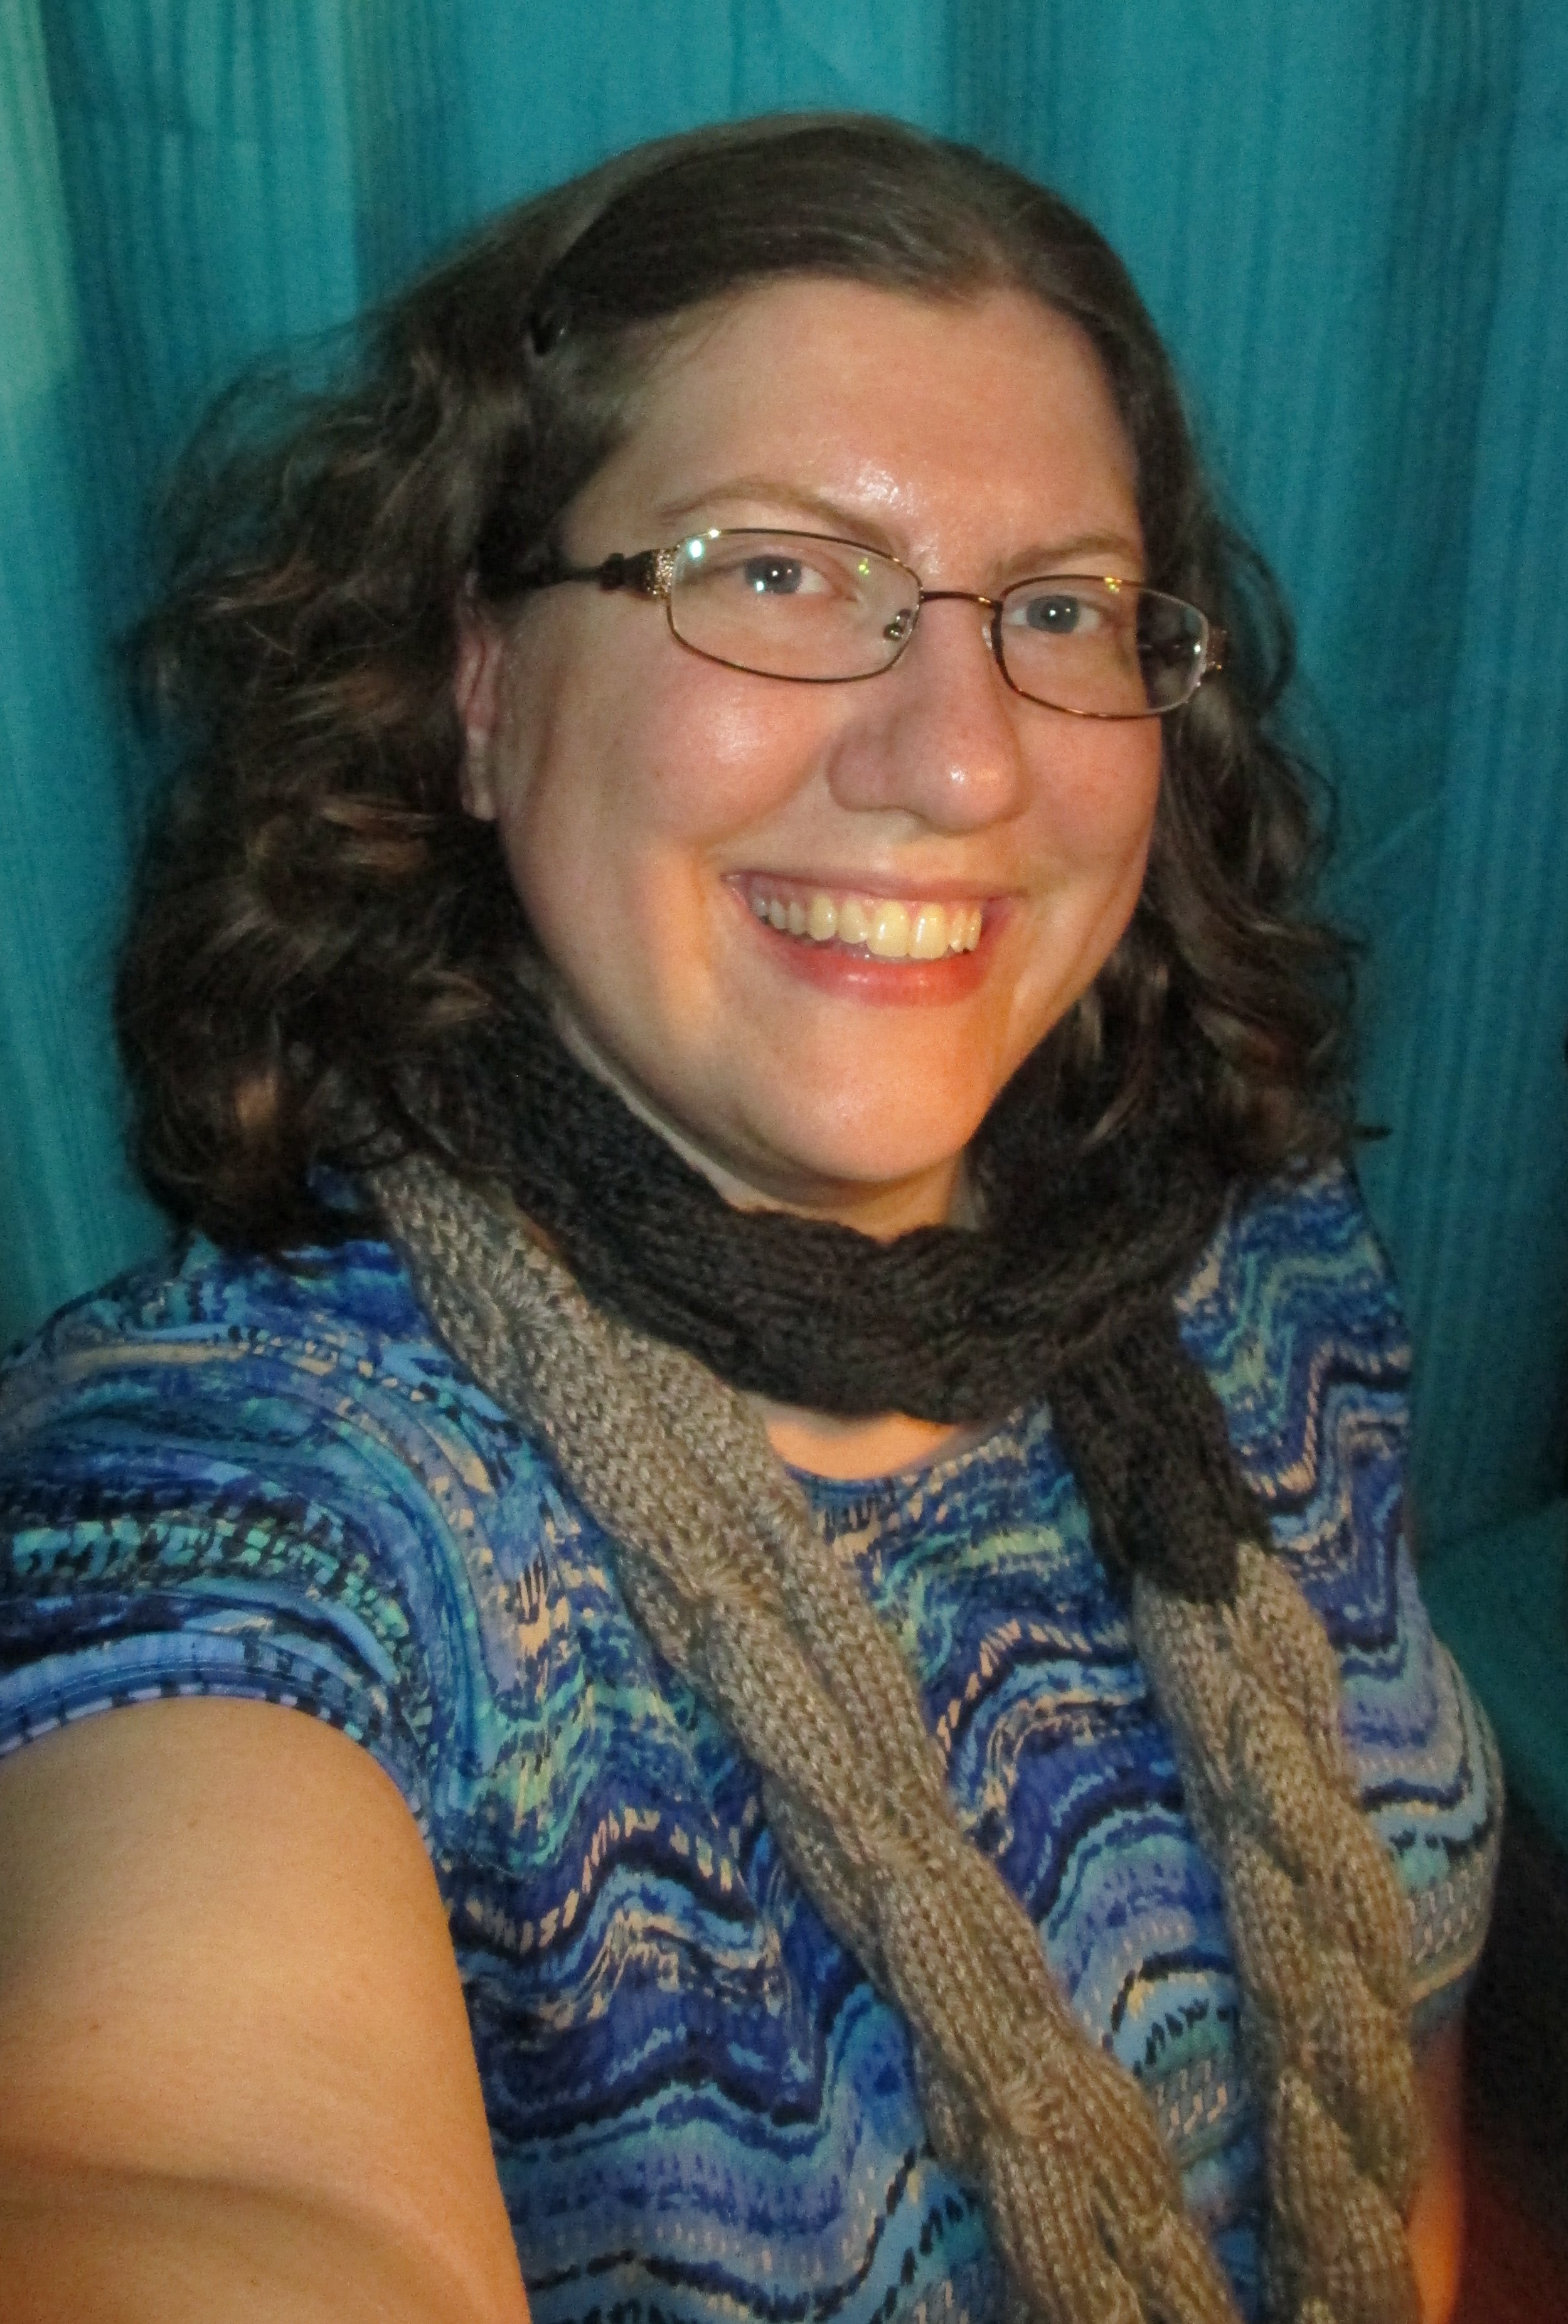
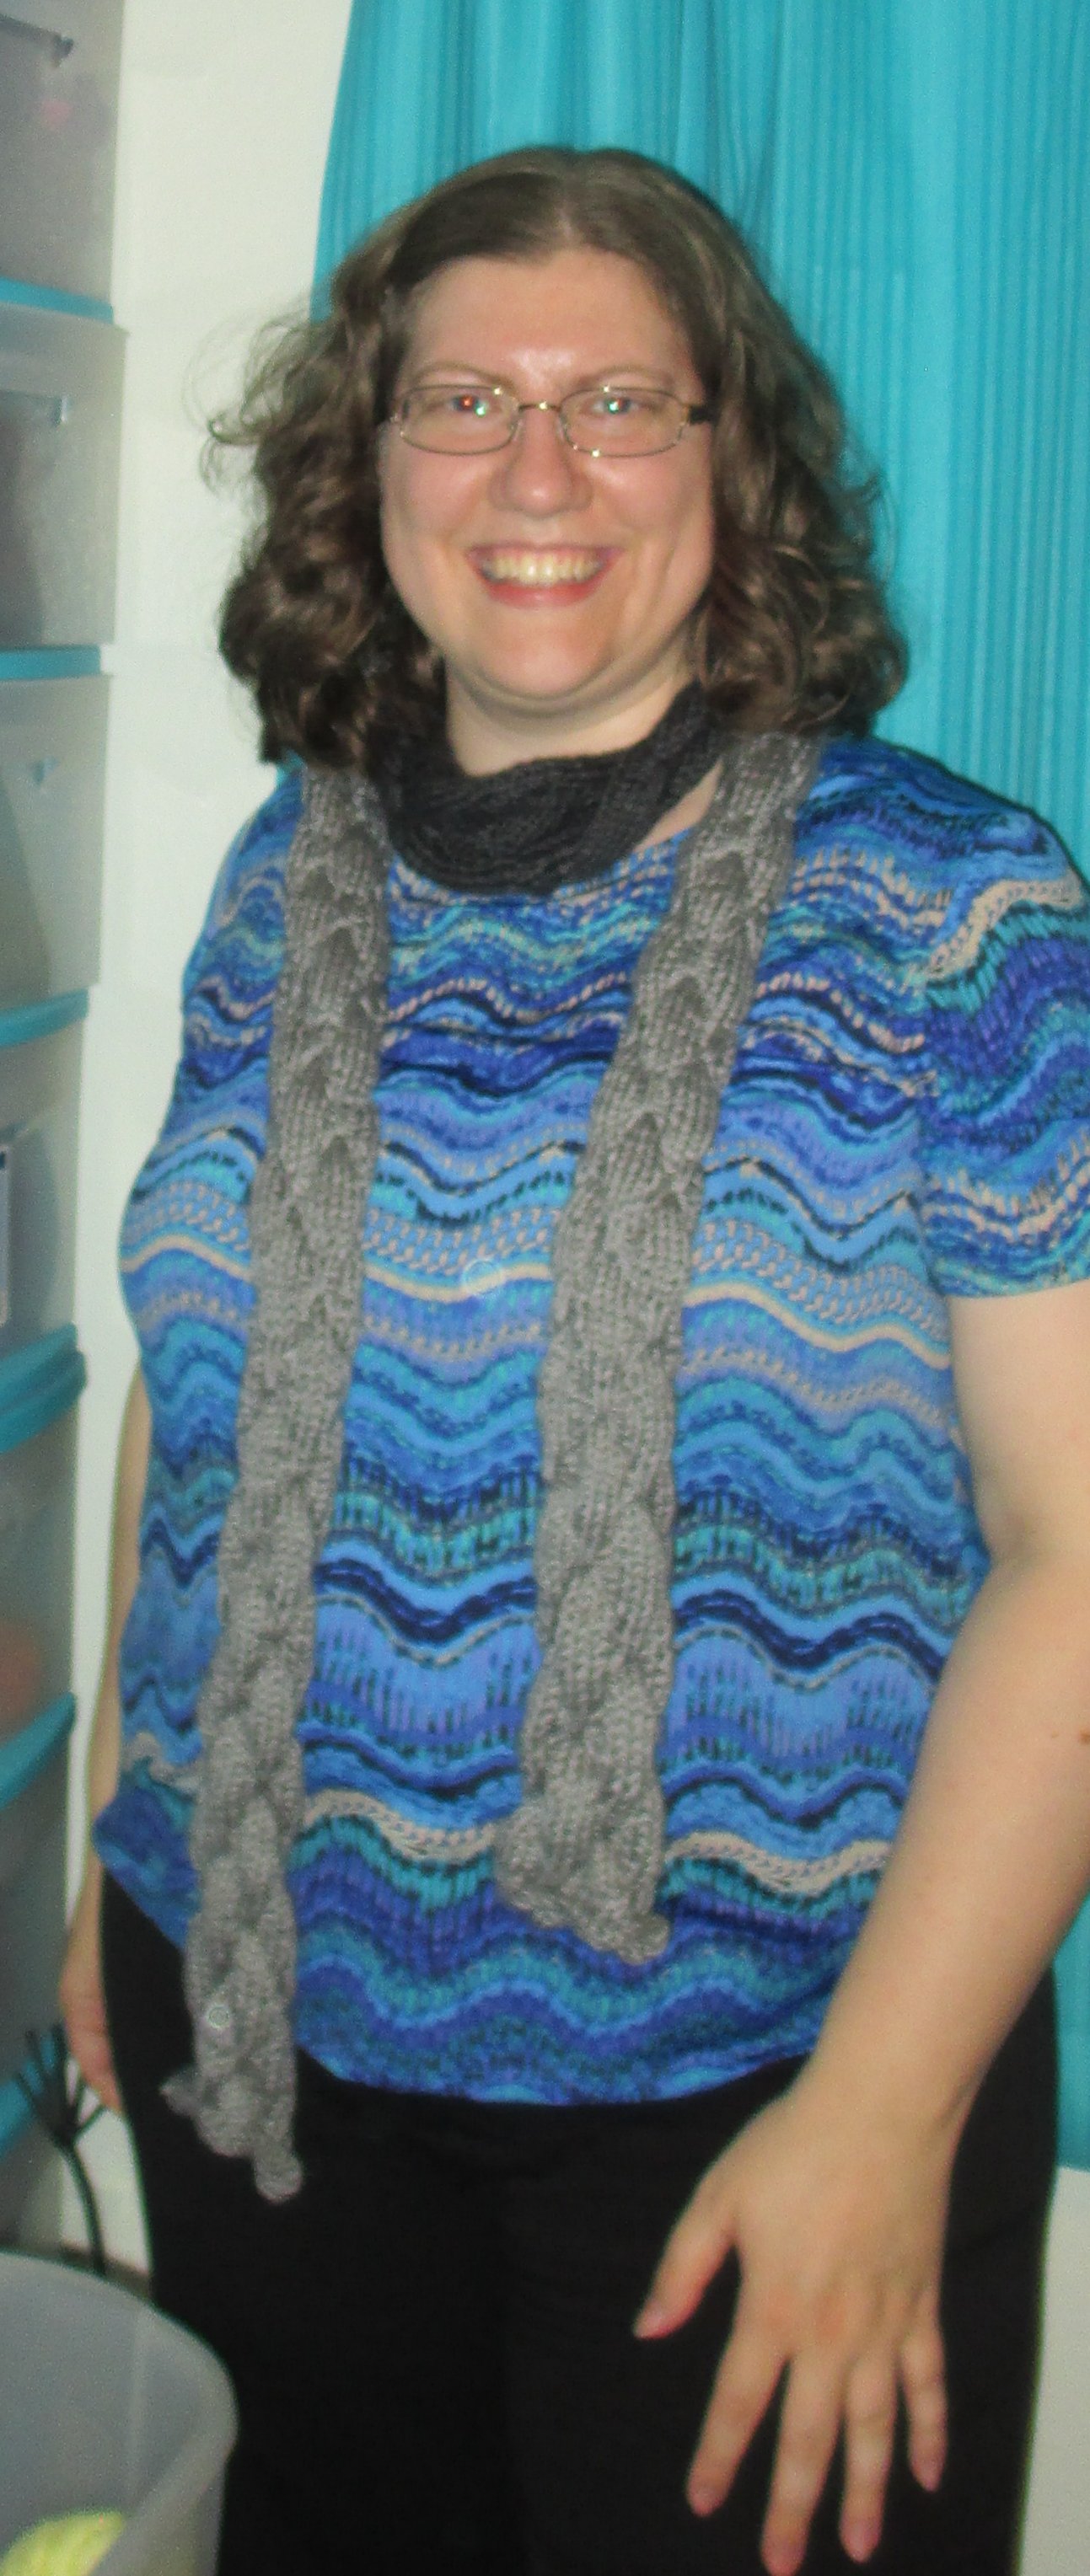
After all that time I put into the scarf, I took a few photos of it. Then a few more. I may have gone a bit overboard. I decided that the real reason that the butterfly scarf took so long is because it wanted to go on adventures, and, well, this happened:

The Adventures of the Butterfly Scarf

*http://www.vogueknitting.com/resources/stitchionary/knit_purl/butterfly_stitch
http://knitting.about.com/od/stitchglossary/g/butterfly.htm

Posted in Knitting | 1 Comment

My First Shawl

Triangle Shawl

img_7892

  • Pattern: https://glennaknits.com/2009/12/03/a-tale-of-two-scarves/
  • Needle Size: 7
  • Yarn:
    • Brand: Caron
    • Type: Caron Cakes
    • Color: Cake Pop (grey and blue)
  • Pattern modifications
    • Edges: I didn’t garter stitch the edges. I left them stockinette because I like how it looks and the eyelets work well enough to stop the edge from rolling.
    • ‘Paired Garter Ridges’: Apparently I didn’t read the directions very well, because instead of two rows of purls with a knit row in between, I just did two purl rows.
    • Spine: When knitting the spine, I always kept it stockinette instead of purling for the pattern rows.
    • Distance between pattern rows: I used length rather than row count to determine when to start a pattern row. I purposely let it be a little organic and uneven. I went a bit longer than the length of the first two joints of my pointer finger – I counted when I was almost finished and it ended up being about 15 rows per stockinette section. (I think it varied between 12 and 18.)
    • Length: My plan was to do two full repeats of the color pattern then bind off after the next eyelet row. I was running low on yarn, so the last stockinette section ended up a bit short. I would have been fine with two skeins, but when I joined the second skein I cut it near the middle to preserve the color pattern.
    • Spontaneous modifications: I know I missed the eyelets along the spine a few times. I may have even missed eyelet at the edges a time or two. I counted the stitches on each side of the spine before the third eyelet row – I was only one off by and I corrected it in the eyelet row.

knitting2

I chose this pattern because I was looking for a triangle shawl where the stripes would form V’s, to really show off the Caron Cake’s variegation. I did some design work over Thanksgiving, practicing with some kitchen cotton and figuring out my variations. I cast on when I got home from Thanksgiving, and cast off on December 23. I finished before Christmas!


Posted in Knitting | 1 Comment

Gluten Free Christmas Party Treats

Just a list of gluten-free goodies I brought to a Christmas party this weekend.

img_7868

Fudge: Fudge Recipe

Recipe is naturally gluten-free.

Cut into 120 pieces (about a centimeter square): 32 cal.


img_7875

Gluten-Free Mini Chocolate Muffins

I’m working on a proper post for these. Brief recipe: 1 box gluten-free chocolate cake mix, 1 can pumpkin, 1/4 to 1 cup chocolate chips. Mix. Bake in a mini muffin tin at 350 degrees for about 16 minutes.

First time trying this with gluten-free cake mix. Turned out pretty well, just don’t eat right after eating something else chocolate (like the fudge), or it tastes off. Might have been better if I could find a dark chocolate cake mix or use mini chocolate chips (both called for in the original recipe).

35 muffins: 73 cal.


img_7876

Gluten-Free Marshmallow Rice Krispy Treats

Basic Rice Krispy Treat recipe, with gluten-free Rice Krispies.

About 47 cal.


img_7879

Chocolate Crinkle Cookies

Flourless Chocolate Cookies

Pretty much followed the recipe, I used 3 egg whites. These have a meringue-like texture (which makes sense, as they are mostly egg white).

22 cookies: 112 cal.


img_7884

Peanut Butter Chocolate Chip Cookies

http://www.averiecooks.com/2013/01/peanut-butter-chocolate-chunk-cookies.html

I used 60% cocoa chocolate chips, but otherwise followed the recipe.

These are intensely peanut buttery, and very good. It shocked me how perfect the texture is with these: there is no flour or flour substitute, just peanut butter, but you can’t tell.

32 cookies: 107 cal.


img_7886

Kransekake

http://www.food.com/recipe/kransekake-18-layer-norwegian-wedding-cake-323624

This was my first try making kransekake. The biggest tip I have so far: don’t start by making a full batch; it makes a huge amount.


img_7888

Gluten-Free Chocolate Chocolate Chip Cookies

I’m working on a chocolate chocolate chip cookie recipe, and I tried this version with gluten-free flour. It wasn’t terrible, but not good enough I’m going to bother posting the recipe. The texture was kind of weird, but it did improve with time – they were better a few days later than they were fresh.

73 cal.


Posted in Uncategorized | Leave a comment

Gingerbread House

There was a gingerbread house contest at work this week….

img_7804

It might have been more epic, but I only had three days to prepare.

I used this recipe for the ginger bread: http://www.foodnetwork.com/recipes/gingerbread-house-recipe.html.

I’ve never made gingerbread before, so I followed the recipe pretty closely. I doubled the recipe, and I did bake for a few extra minutes, as one of the comments suggested (because I was more interested it structural integrity than possible over-baking). I also left out the ground cloves (because I didn’t have any).

The glue/mortar is all almond bark. The roof shingles are Cinnamon Toast Crunch cereal.

This slideshow requires JavaScript.

Things I learned:

  • Chilling the dough too long makes it really hard to work with
    • I mixed it one night and baked it the next. I had to use an ice cream scoop to get it out of the bowl, then work it for a while to get it flat on the cookie sheets.
  • When designing the house, remember that gingerbread has depth
    • It will not fit together the same you the card stock templates do
  • Cinnamon Toast Crunch is more curvy than I realized, but it turned out to be a cool look. (I only bought the cereal because it had a minion toy in it…)
  • Cinnamon Toast Crunch is delicious with almond bark
  • Those M&M’s take forever to put on
  • I should have cut windows and put an led tea light inside
    • I thought of it as soon as I’d finished decorating
  • The Howl’s Moving Castle movie is even closer to the book than I remembered when I first watched the movie (I was listening to the audio book while decorating)

img_7815

My house did not place in the contest (top 3 got prizes). So I took it home and butchered it.

To be fair, there were some pretty cool entries:

This slideshow requires JavaScript.

Candy-Land got first place, followed by the football stadium, then the store. Personally, as impressed as I am by the Candy-Land display, I think they cheated by using graham crackers for the main house. And I think some of those decorations are non-edible.

More photos: https://goo.gl/photos/du8bQhFe8vqgd6my9

Posted in Christmas, Crafts, Recipe | Leave a comment

Halloween 2016

Trick-or-Treating

This slideshow requires JavaScript.

Because if I’m going to do this, I’m going to do it right. Besides, I went to all the trouble of painting those boxes, I’m going to use any excuse I can to use them.

Not too many kids came, but I got a lot of compliments.

Pumpkin Decorating Contest

Last year, I stuck a mini pumpkin in a jar. This year, it was my entry for the mini pumpkin decorating contest.

I had four led lights taped around the top, covered by the black duck tape. It was supposed to make it look glowy, but it didn’t really work.

Cubicle Decorating

img_7709

I started with five identical boxes. I painted them the same way I painted my original castle (https://geekgirlmae.wordpress.com/2015/01/17/cubicle-castle-the-making-of/).

There are two tips that are the most useful. The first is to use a ‘paint pad’ – I use Shur-Line Handi Painters (https://www.amazon.com/Shur-Line-1500C-Handi-Painter/dp/B00004Z4H2). They are disposable and I’ve bought them at both Menard’s and Home Depot for under $2 a piece. They give a very thin layer of paint that doesn’t warp the cardboard and dries quickly.

That leads to the other tip: While you are in the paint aisle, look for the ‘oops’ or ‘miss-tint’ section. It’s the paint that came out the wrong color, or someone decided  they didn’t want it, and you can get it really cheap. It’s great, because you can even get the fancy paints for cheap, like the paint-and-primer-in-one kind that makes it easier to cover any writing on the cardboard.

This slideshow requires JavaScript.

I won first place in the small-group cubicle decorating contest. Some of my coworkers joked that I spent more decorating than I won in prize money, but I really didn’t spend much. The only new elements were the teal boxes and a few tablecloths that I got at 90% off after last Halloween and. The Sharpies for the line-work on the boxes was probably the most expensive thing. Technically, the pop-up castle on top was new too, but I didn’t buy it specifically for Halloween, just integrated it into my decorations.

The whole thing actually started with me trying to figure  out a way too have the pop-up castle above my head. I eventually used a measuring tape and mocked out my cubicle in my living room. I precariously stacked some plastic bins and smaller boxes to get the size and relative position of the shelves, then played around with my boxes until I made something cool. I essentially had a fort in my living room for about a week.

Of course, then I decided less than a week before the contest that I needed to paint the boxes.(Original plan was to cover them with fabric or tablecloths.)

I managed to get it all done on time – one evening painting, two doing line work, two hours setting everything up the evening before, and another half-hour adding the finishing touches that morning.

I even took over the empty cubicle at the end of my row for some overflow decorations.

You can see all of my Halloween photos here, including the other entries in the pumpkin contest and another entry in the cubicle contest.

https://goo.gl/photos/81QbWokZZv9EtsLV8

Posted in Halloween | Leave a comment